Cargo Basket installation (instructions/video)Updated 2 months ago
The Ariel Rider Kepler model's rear cargo basket is designed to directly connect to the bike's included rack and comes with the necessary hardware for attachment.
However, for the Grizzly and X-Class models, you'll need to purchase a separate compatible rear rack, such as the Cargo Plus Rear Rack.
*Please note, this is for X-Class 52 models prior to 2025
This cargo basket is also compatible with the front rack of the Kepler model. To install, first set up the rack, then align the holes of the rack and basket. Use the washers and screws provided in the cargo basket's box to assemble and secure the connection. Follow these guides for detailed instructions on installing your cargo baskets on the Grizzly and X-Class models.
Cargo Basket Installation: X-Class 52V
Cargo Basket on Cargo Rack: Grizzly
Cargo Rack Installation:
Instructions on How to Install the Rear Rack, Cargo Basket, and Passenger Seat on Ariel Riders X-Class and Grizzly:
Instructions for Installing the Rear Rack:
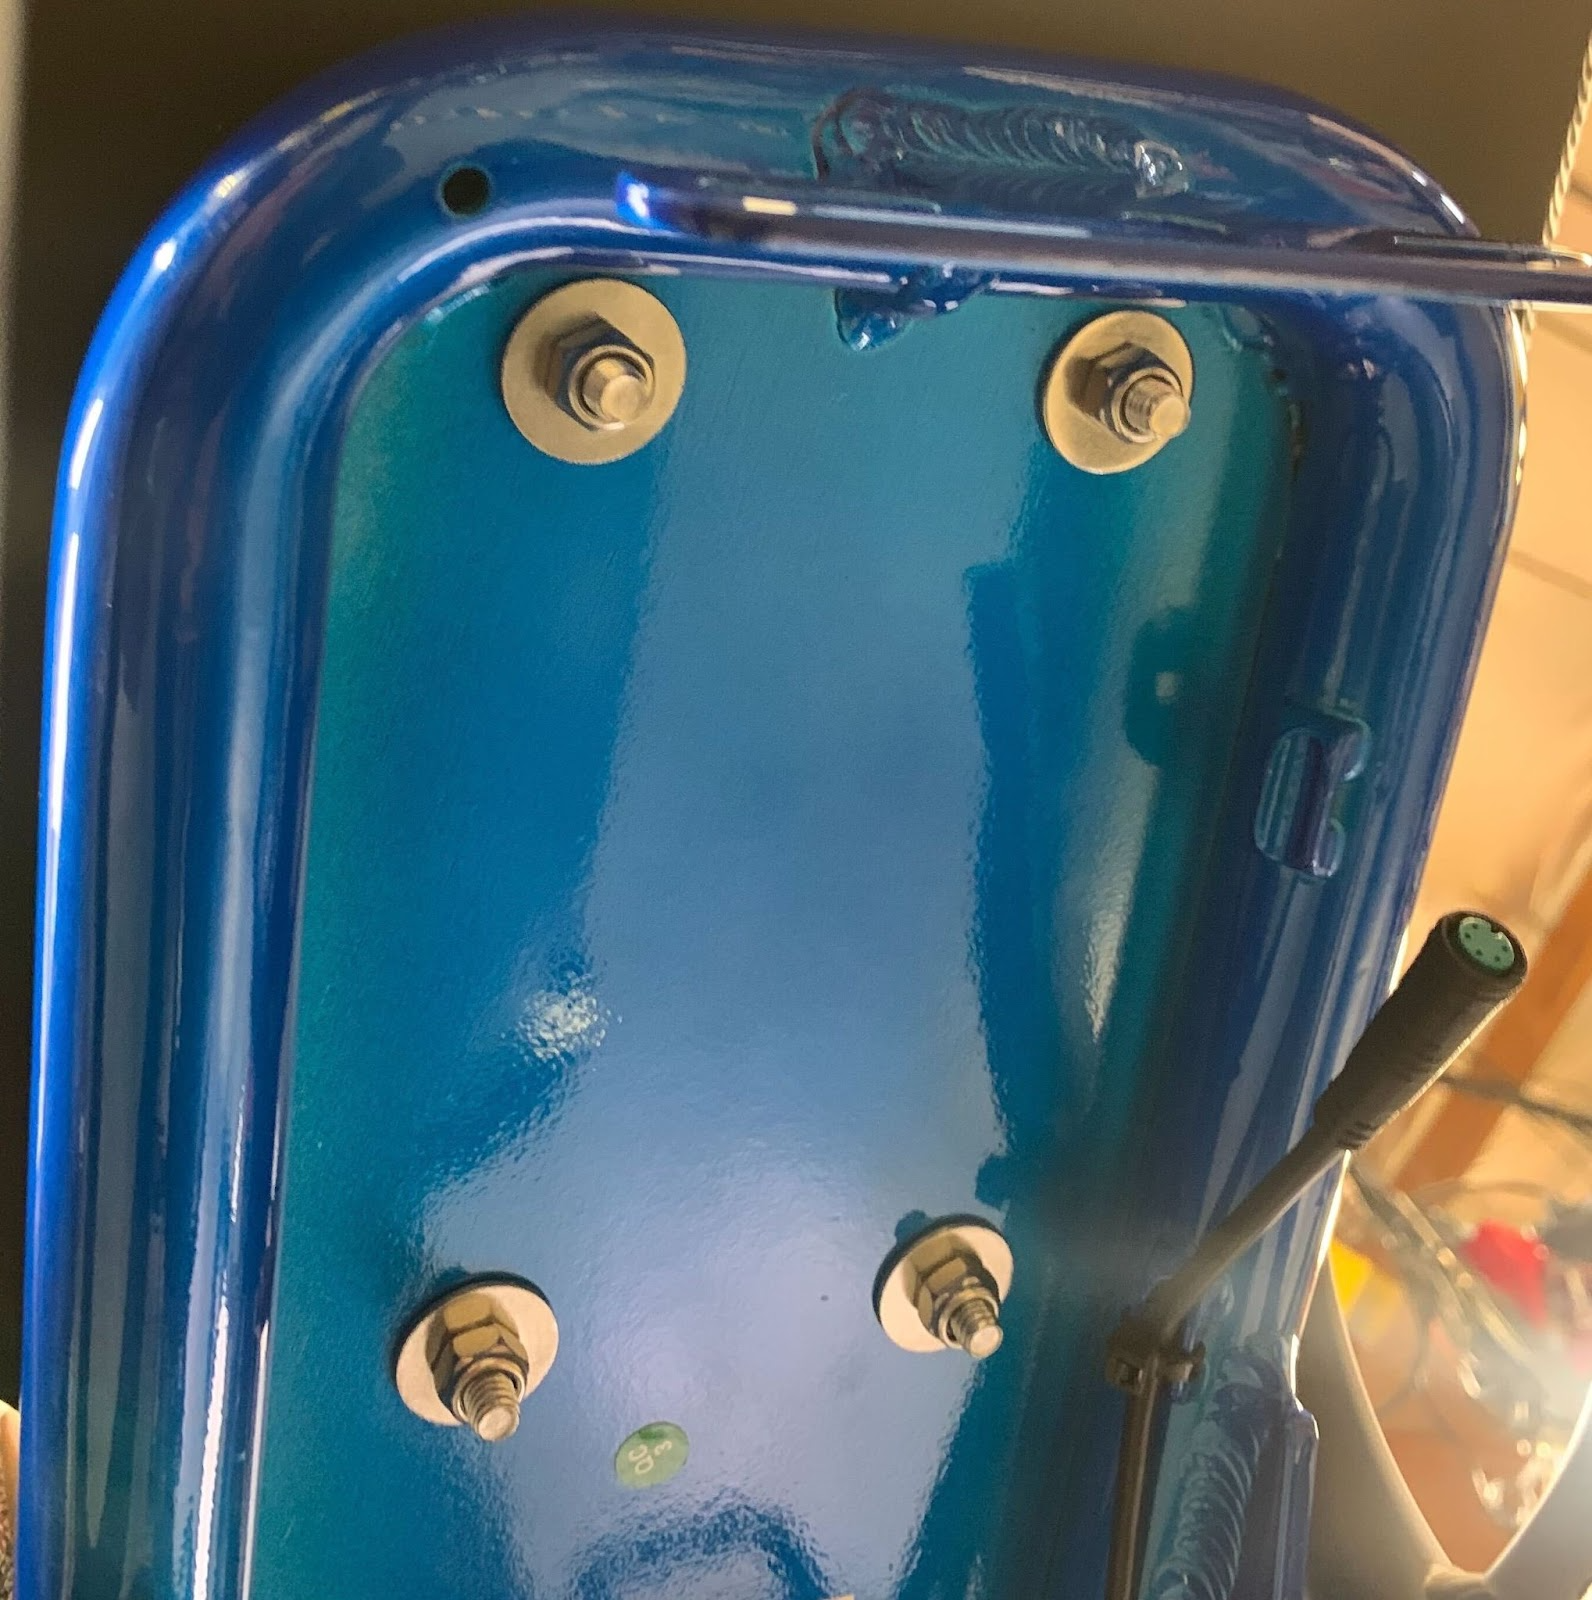
Step 1: Line up the holes on the bike with the holes in the rear rack. Sandwich the black rubber washer between the holes of the bike & rear rack with the silver washer and bolts on top. Secure the bolts down.
Place black rubber washers on the mounting holes of the frame of the bike for the Rear Rack.
Place the Rear Rack on the frame of the bike so that the mounting holes line up with each other.
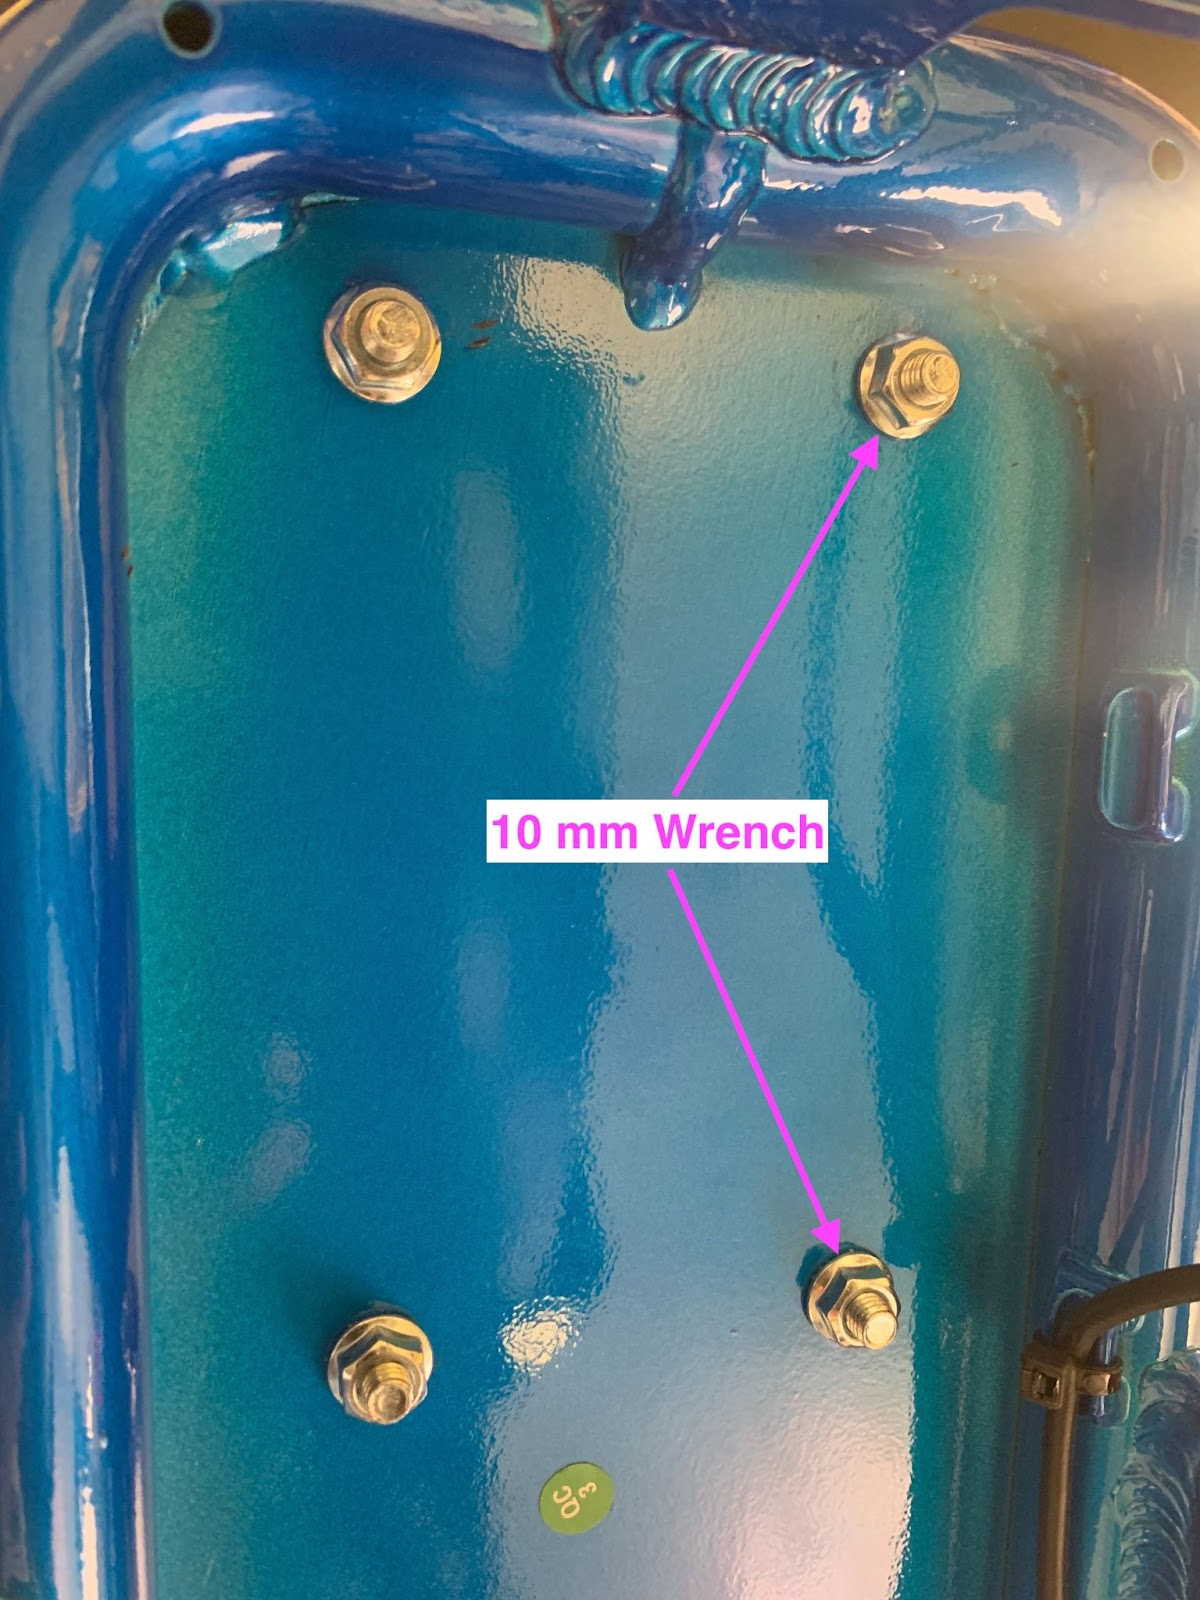
Secure the Rear Rack to the frame of the bike with the supplied nuts, bolts, and washers. You will need a 5mm Allen wrench and a 10mm wrench to secure the nuts to the bolts.
Instructions on Removal of Tail Light:
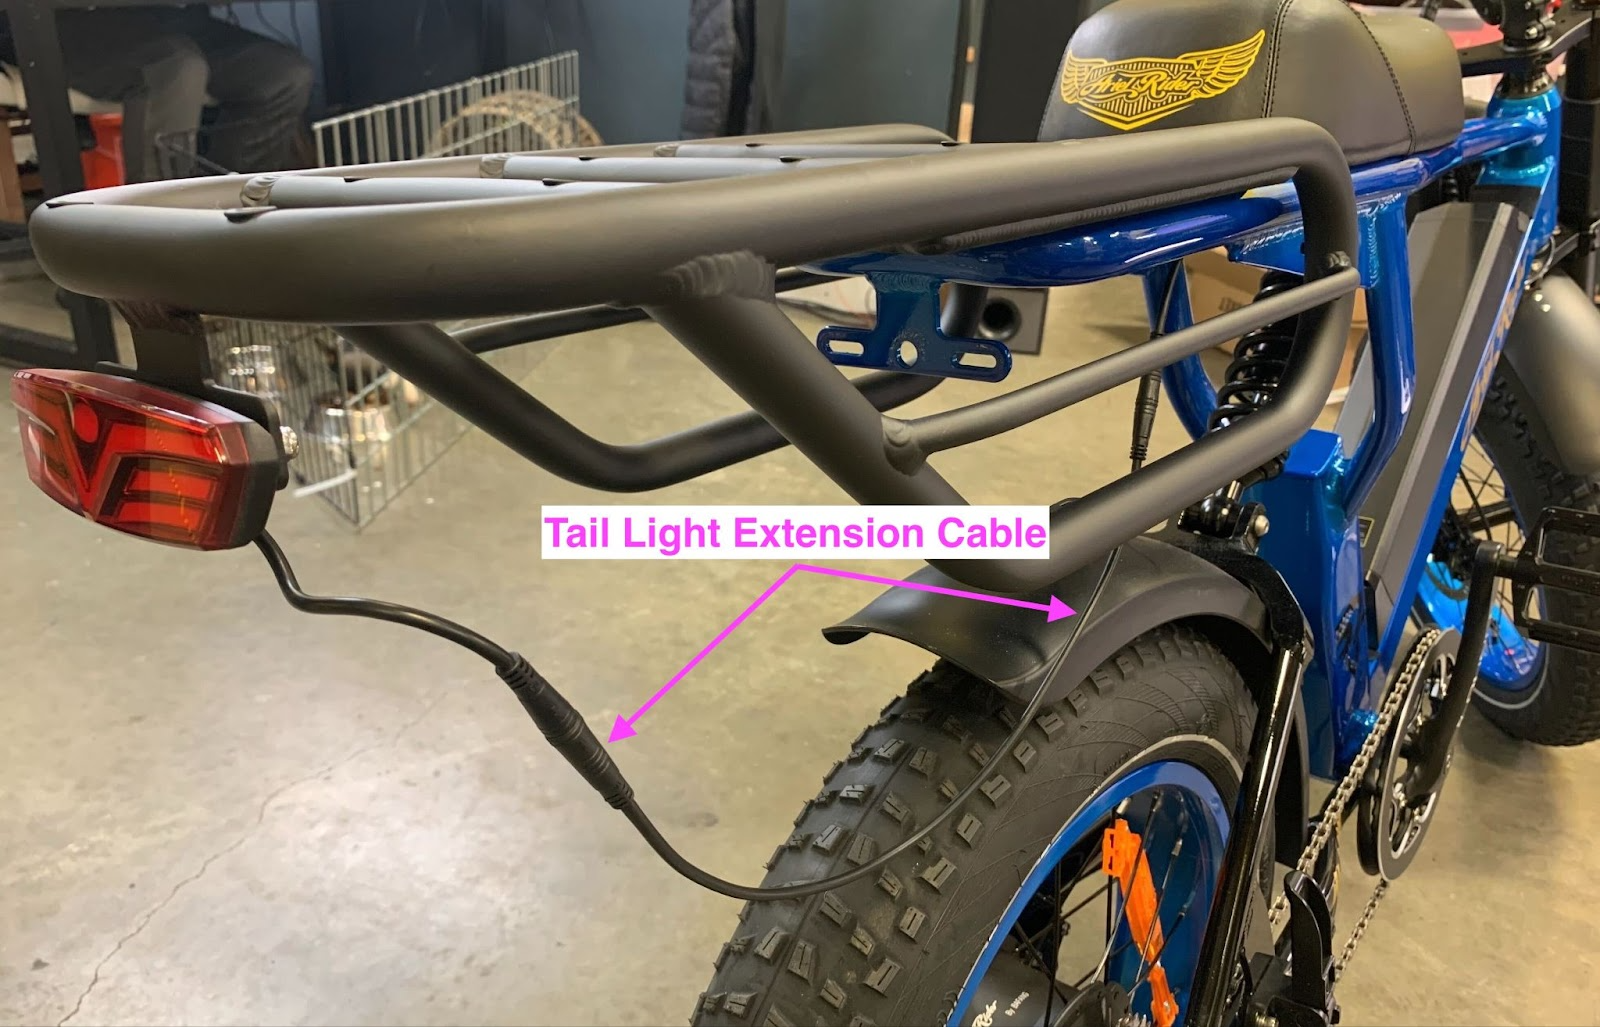
Step 2: To remove the tail light, first clip the zip-ties and then unscrew the two tail light bolts using an 8mm wrench. Disconnect the connection cables by pulling the two ends apart
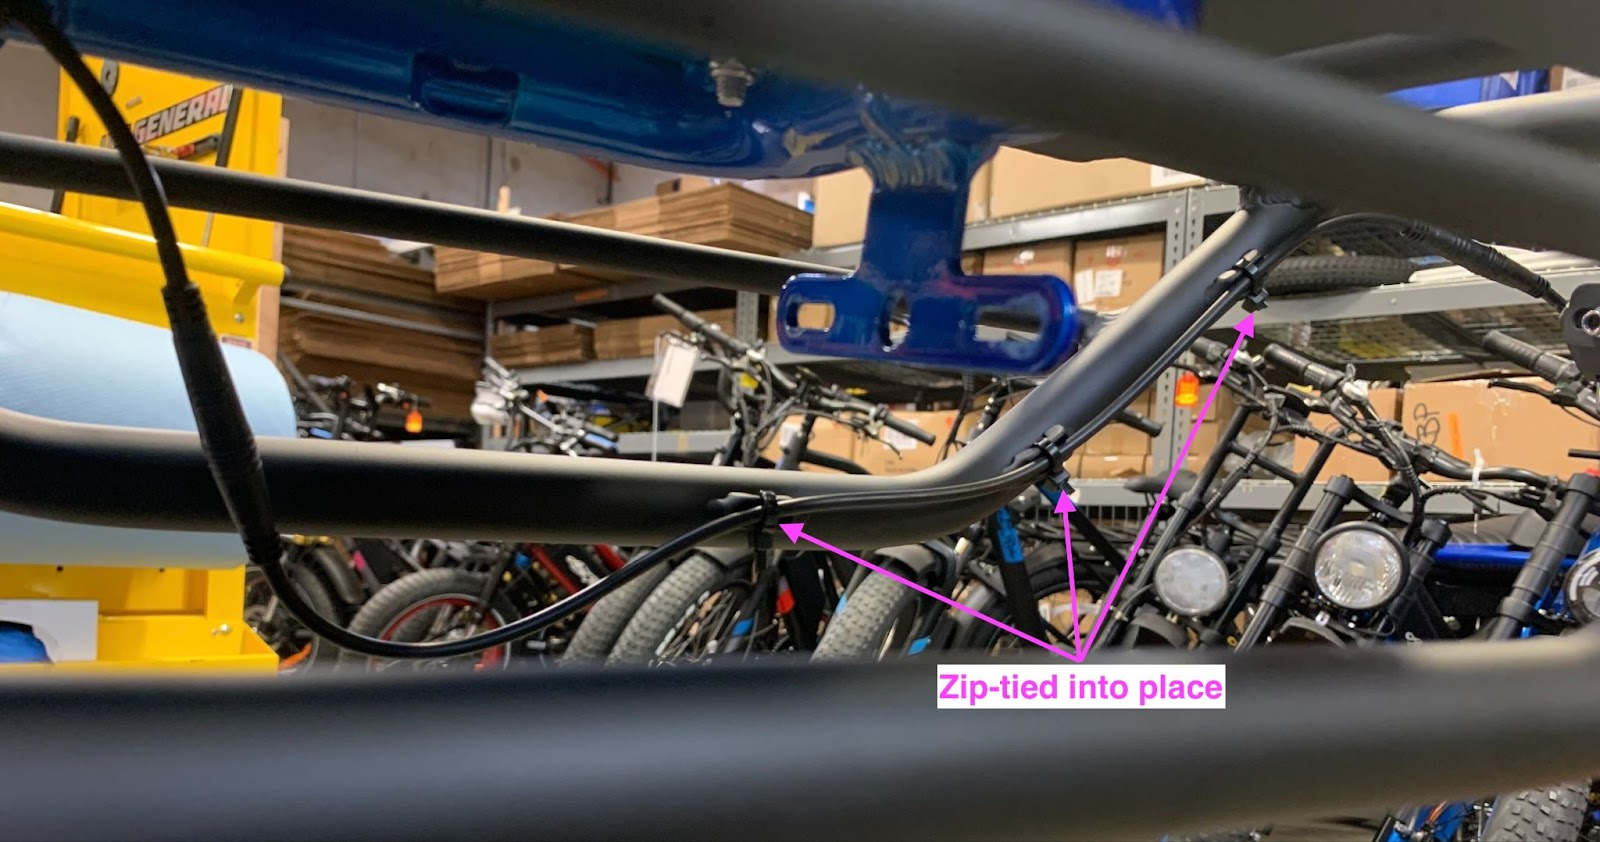
Step 3: Connect the tail light extension cable and relocate the tail light to the tail of the Rear Rack. Then secure the extension cable to the Rear rack using 3 zip ties. Clip the ziptie ends to the desired length.
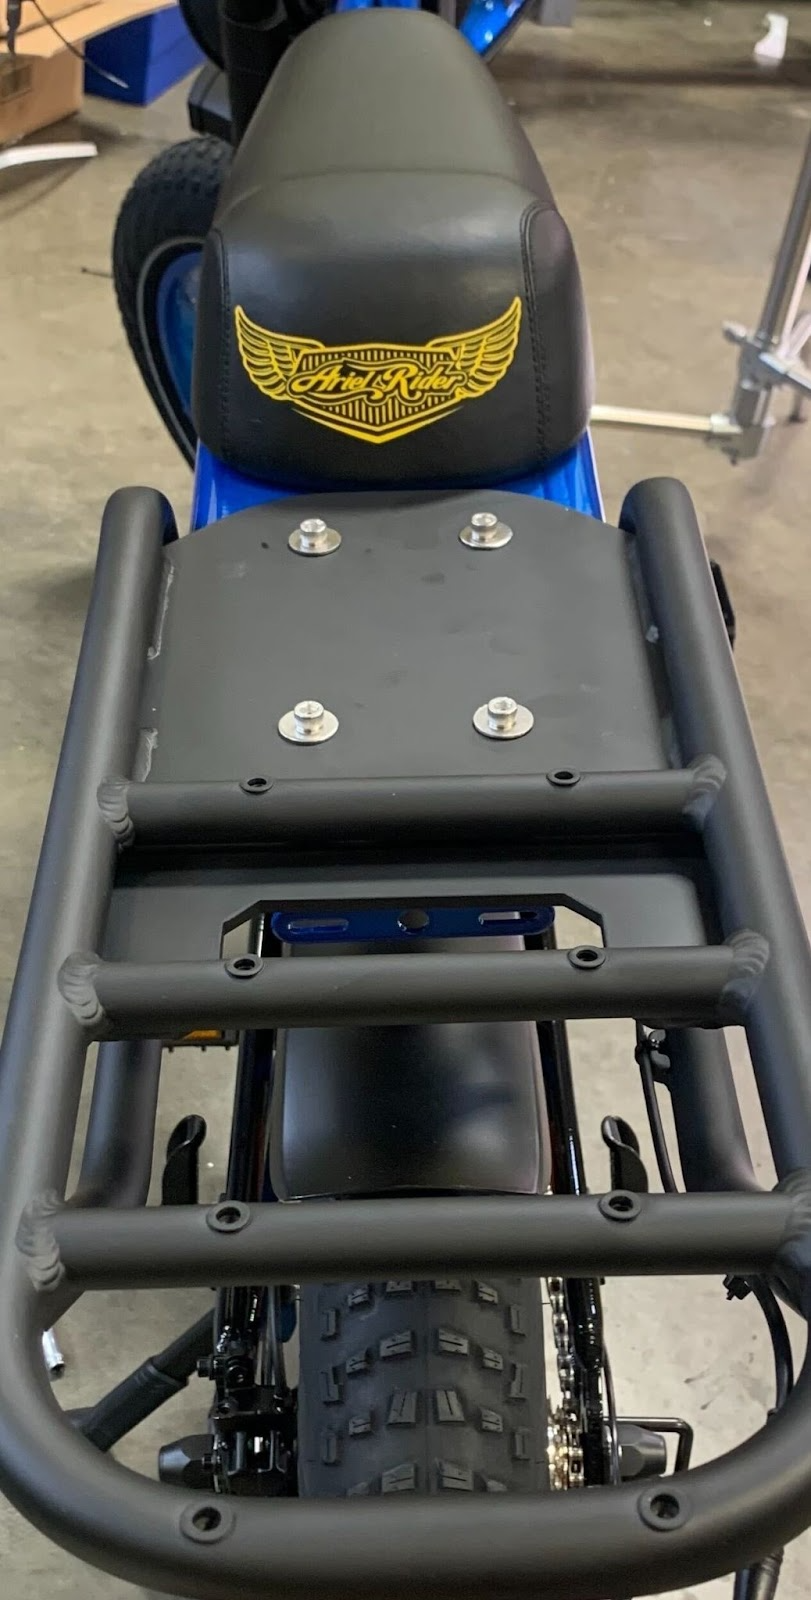
Instructions on Installing Passenger Seat:
Step 4: If the rear rack is already installed, remove the nuts and bolts that are used to secure the rear rack to the frame of the bike. The passenger seat nuts and bolts will be used instead.
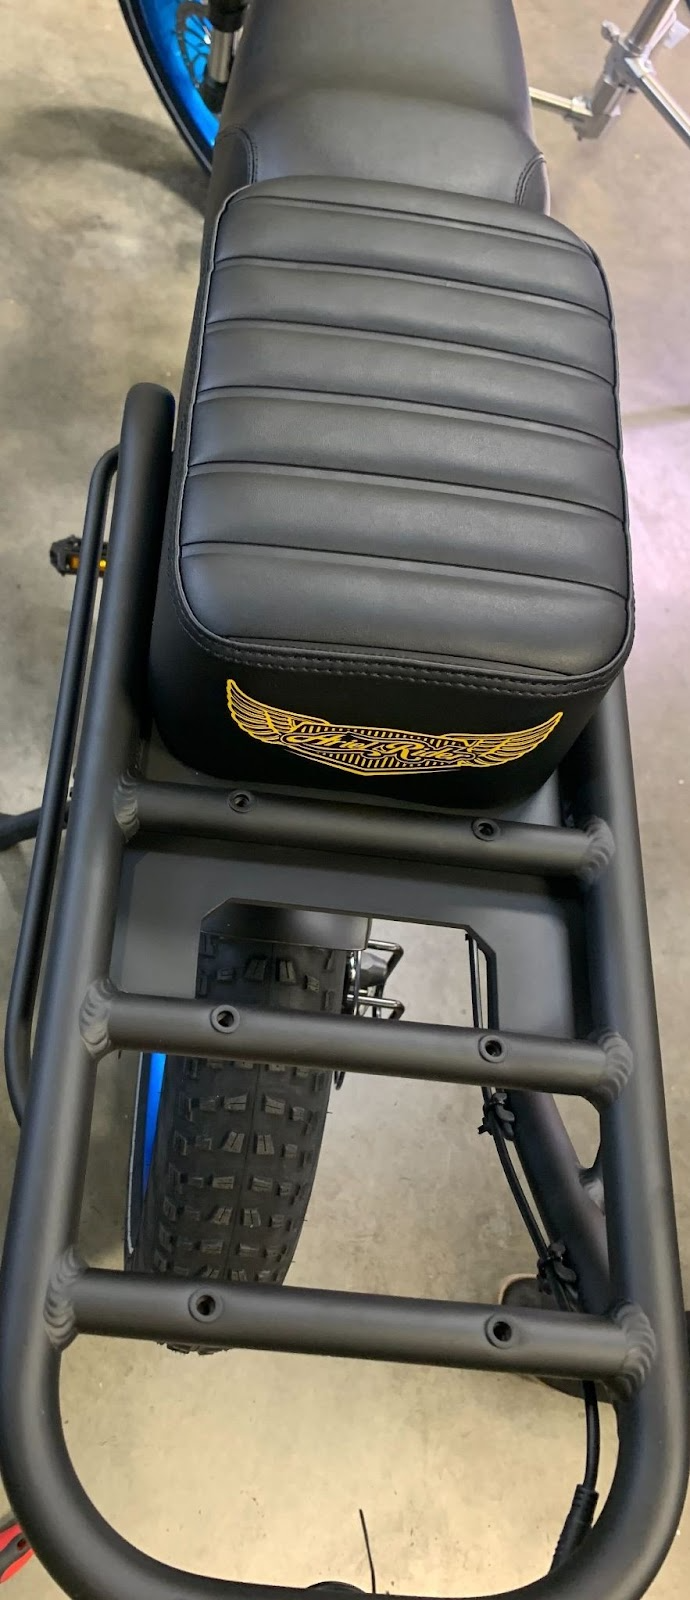
Step 5: Then use a 10mm wrench to secure the bolts of the Passenger Seat to the Rear Rack.
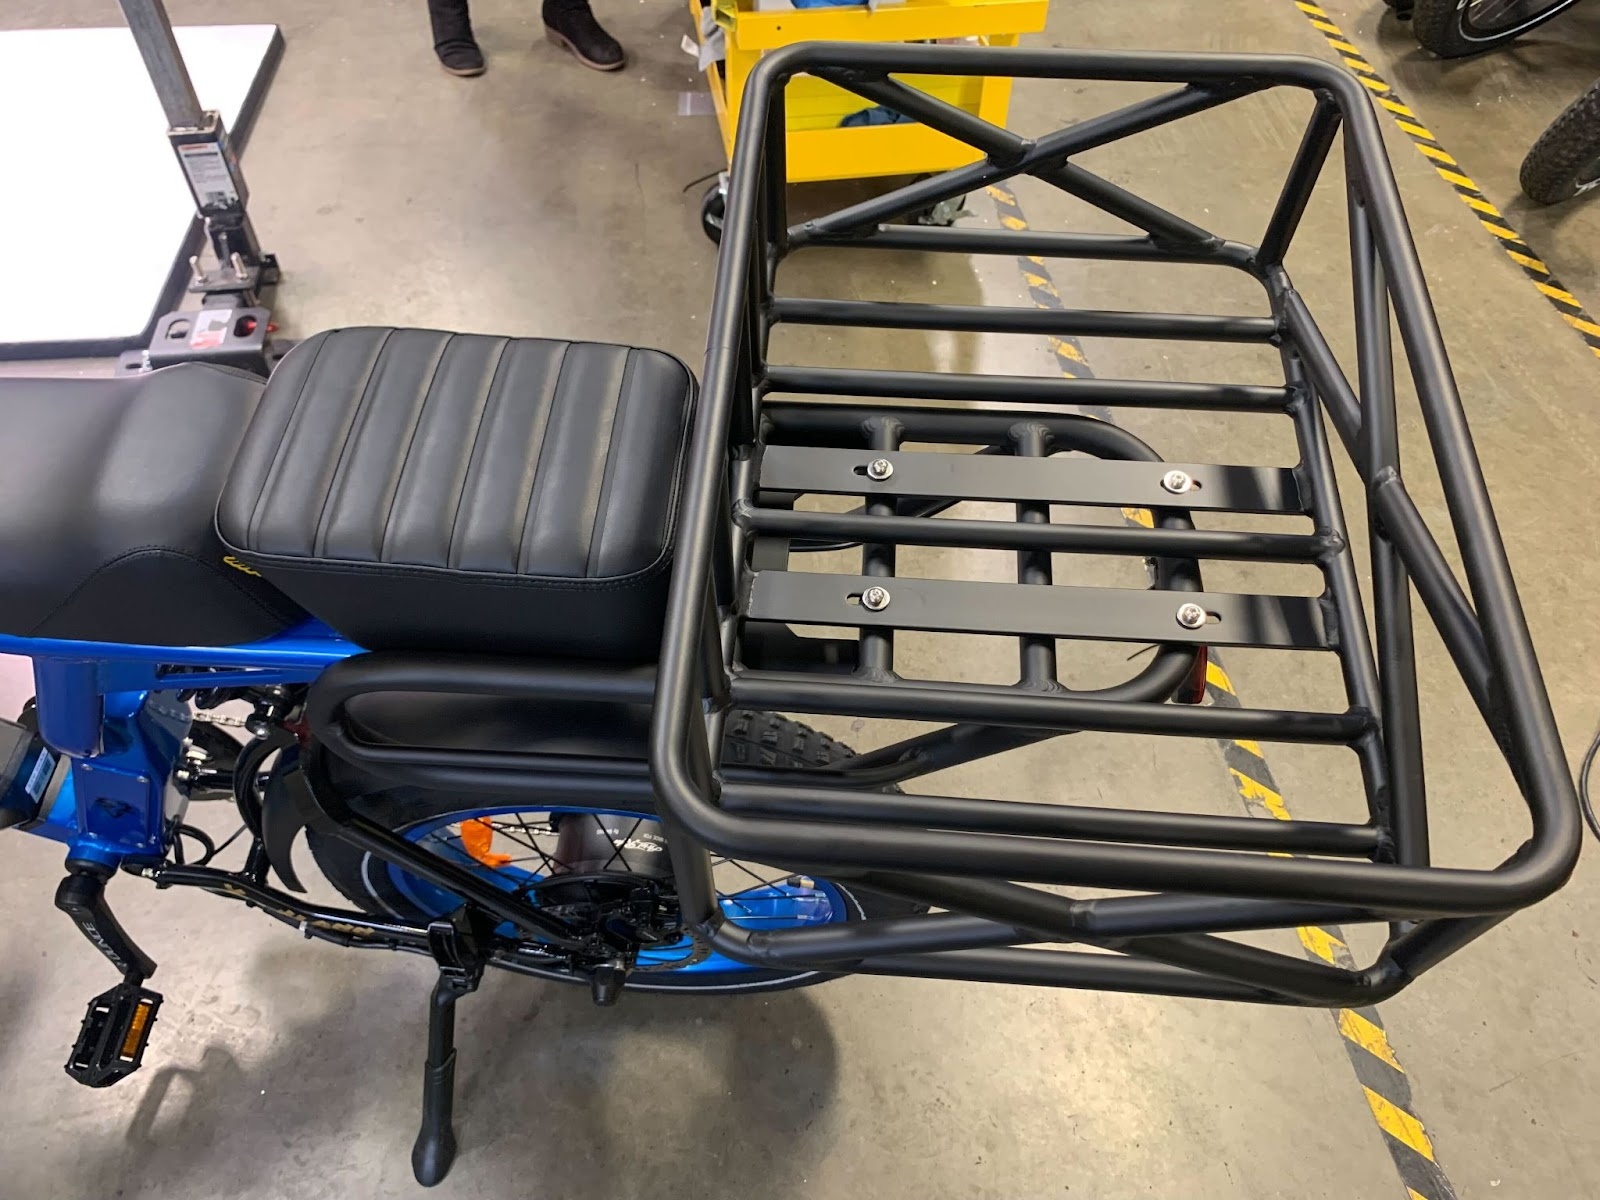
Instructions on installing Cargo basket:
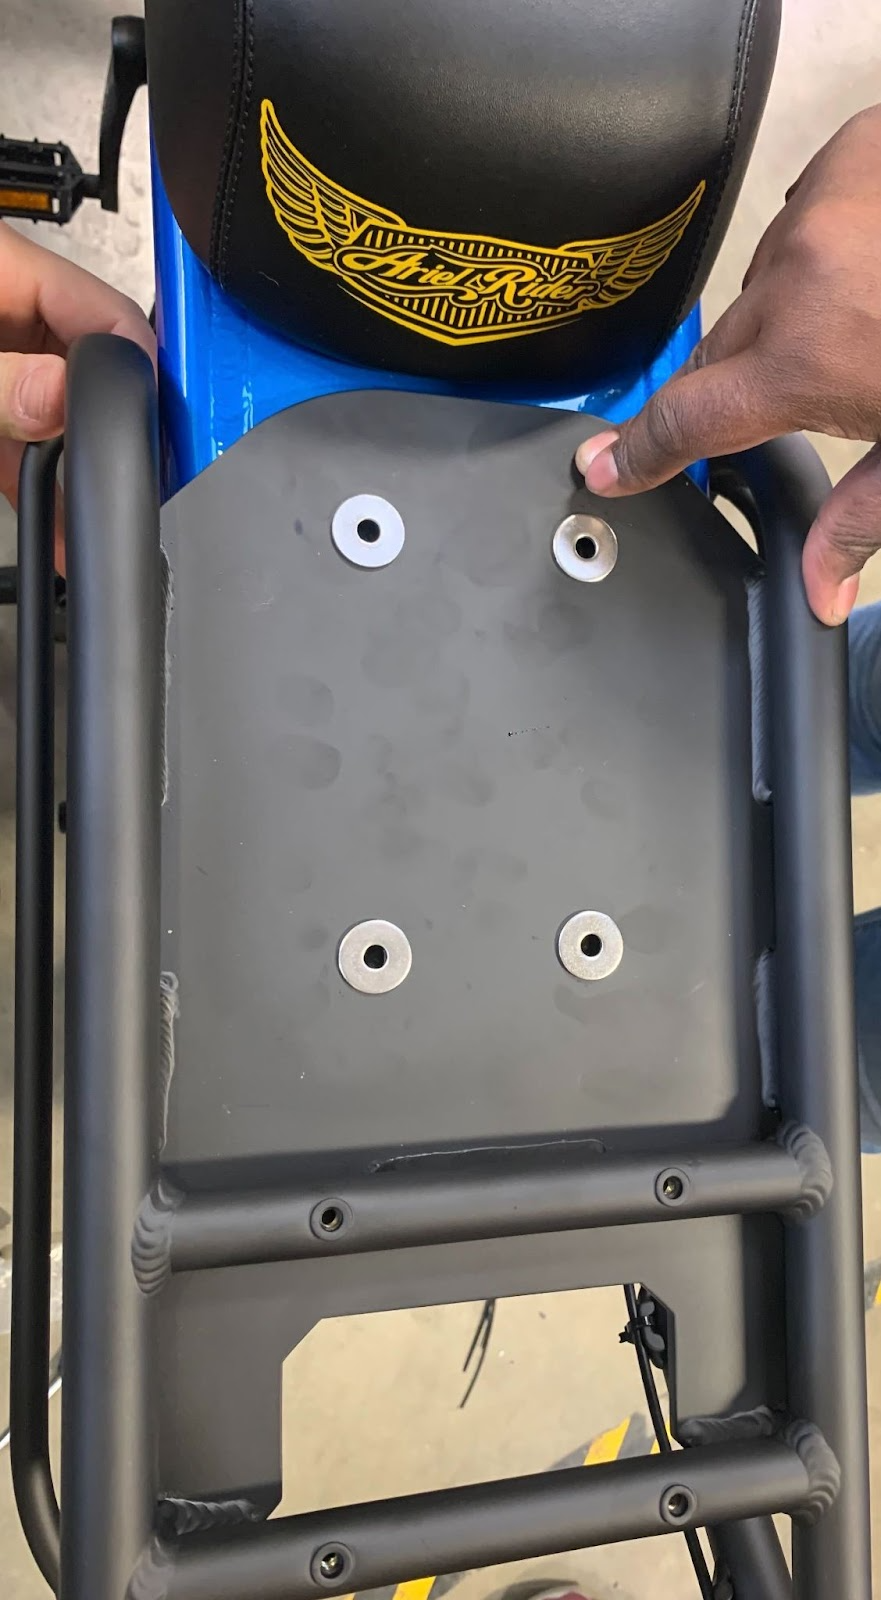
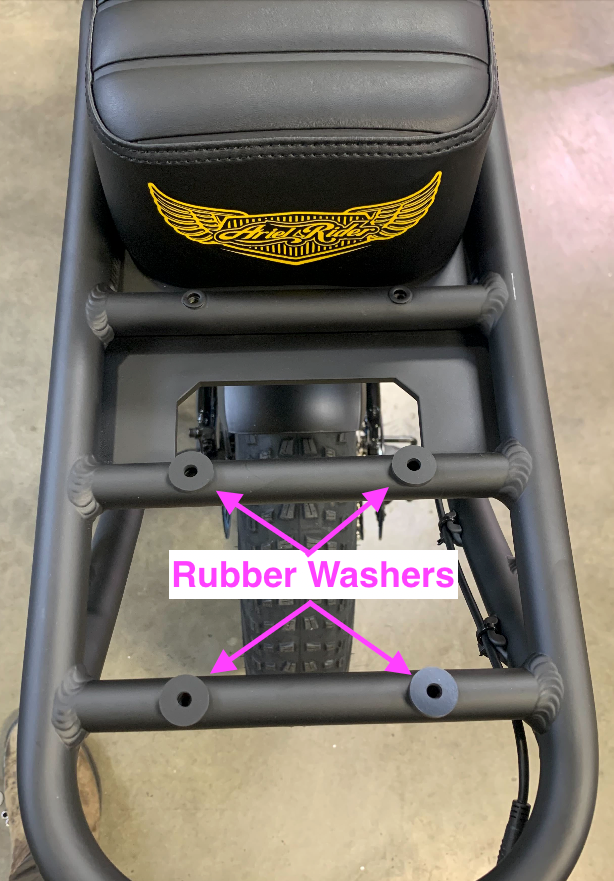
Step 6: Place rubber washers on top of the mounting holes of the Rear Rack.
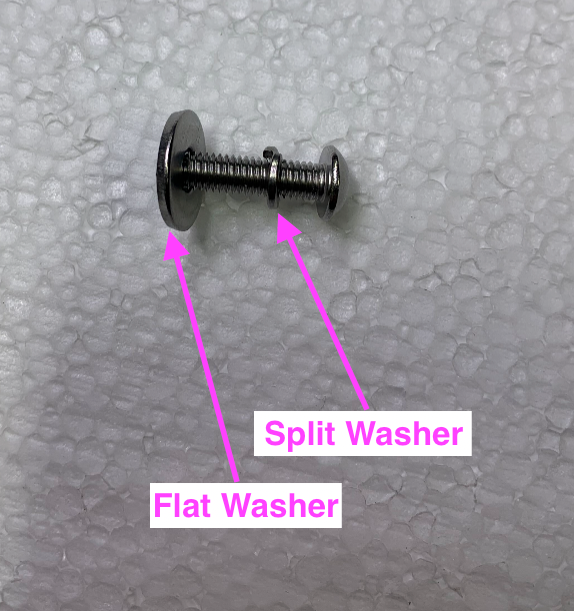
Step 7: Use a 3mm Allen wrench to secure the 4 bolts of the Cargo Basket to the Rear Rack. The split washer should be oriented atop of the flat washer as depicted below.