Cargo Plus Rear Rack installation (instructions/video)Updated 2 months ago
The below video details how to install the Cargo Pro Rack.
Please note that this guide is for Pre-2025 X-Class 52V bikes and the Grizzly Model.
Cargo Plus Rear Rack Installation Instructions
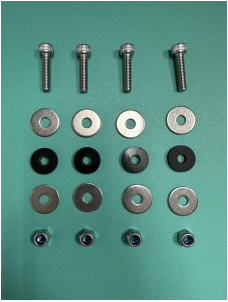
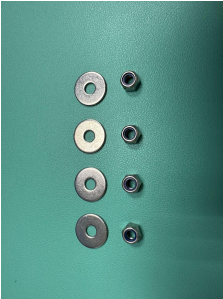
Hardware and Tools Needed:
- 4 Bolts
- 8 Washers
- 4 Rubber Washers
- 4 Nylock Nuts
- 4mm Hex Key
- 10mm Wrench
Step 1: Hardware Check
Step 2: Locate the 4 included Bolts and place 1 washer on each.
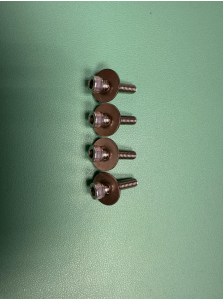
Step 3: With the Washers added, place the 4 bolts through the top of the Cargo Rack mounting plate.
Step 4: From the underside of the Cargo Rack, install the included Rubber Washers onto the bolts. Once the Rubber Washers are installed you will be able to move the Cargo Rack freely without the bolts falling out. (The Rubber Washers will help to reduce vibrations as well as protect the paint on your bike)
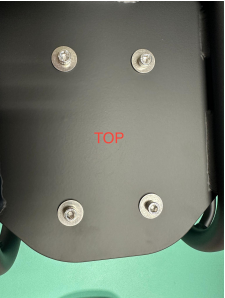
Step 5: Fit the Bolts of the Cargo Rack onto your bike through the 4 mounting holes located behind the seat.
Getting a second set of hands will help keep the Cargo Rack in lace before the last Washers and Nuts are added.

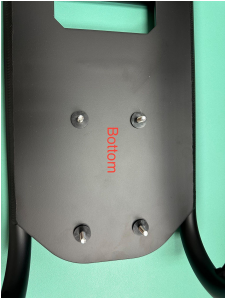
Step 6: Place the remaining Washers over the exposed bolts on the underside of the bike and follow those with the included Nuts.
Step 7: Finished Assembly
Ride Safe and Don't Forget Your Helmet!!