
How to adjust the rear derailleur on your Ariel Rider bikeUpdated 2 months ago
Tools needed: Phillips head screwdriver
Prior to working on your bike, please make sure that the bike is powered off, the battery is removed, and the bike has been power cycled. This video will show you how to power cycle.
Become familiar with the derailleur components for adjustment
- High-limit adjustment screw
- Low-limit adjustment screw
- Cable barrel adjuster
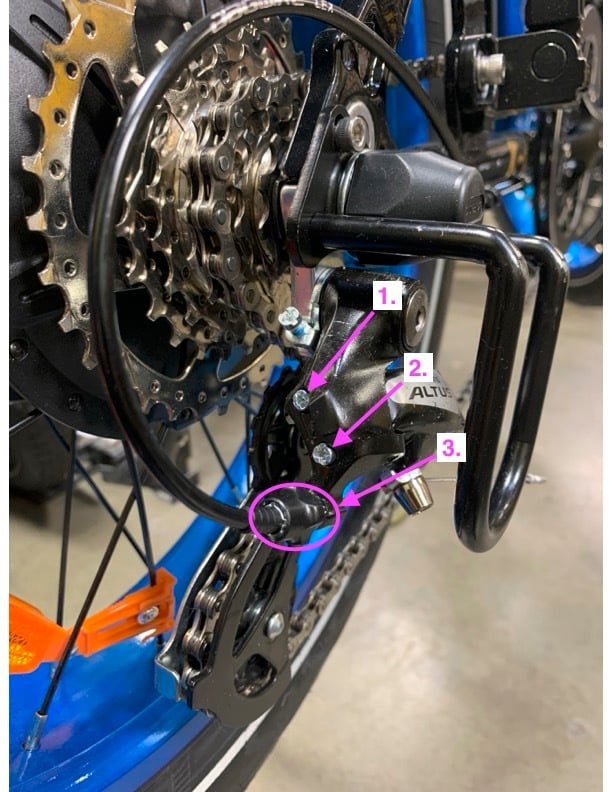
Please note: When shifting gears, ensure that you are pedaling the bike with your hand and the rear wheel off the ground. This will allow the derailleur to cycle through the gears properly. Do not shift the gears with the rear wheel stationary.
Set limit screws
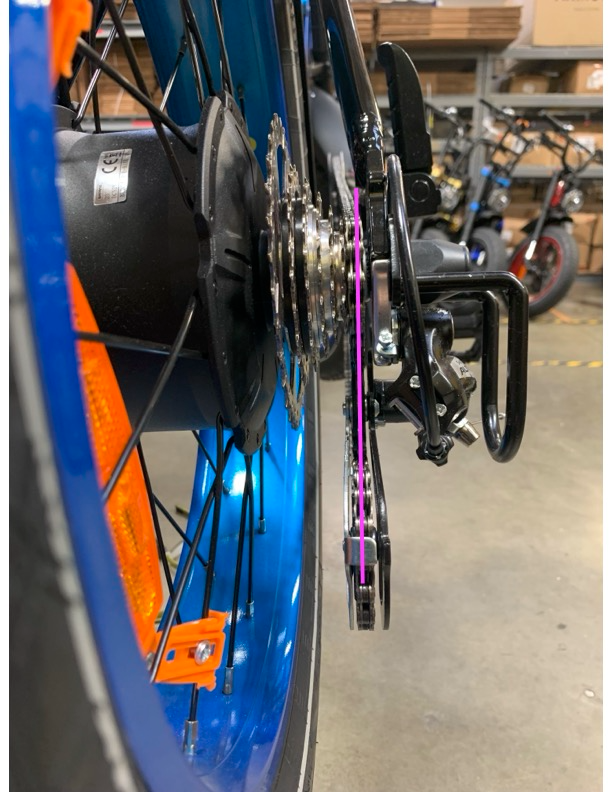
Step 1: Shift the gears so that the chain is on the highest gear, which is the smallest sprocket.
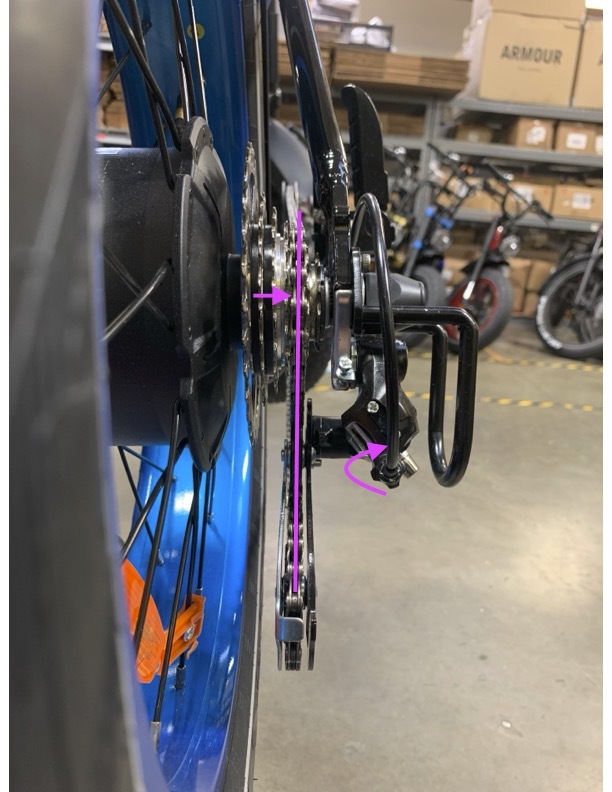
Step 2: Set the high-limit adjustment screw to ensure that the chain cannot slip off the sprocket to the right, between the smallest sprocket and the dropout. The derailleur should be in line with the smallest sprocket, as seen in the image below.
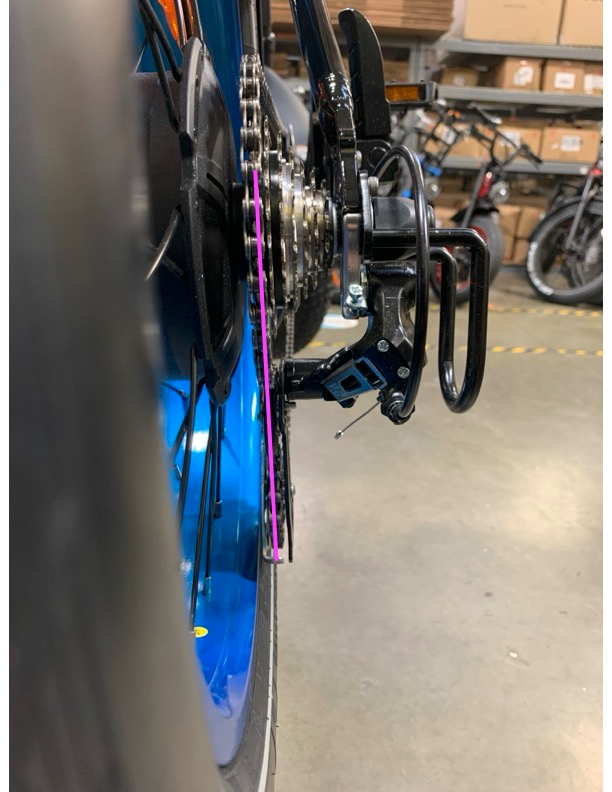
Step 3: Shift the gears so that the chain is on the lowest gear, which is the largest sprocket.
Step 4: Set the low-limit adjustment screw to ensure that the chain cannot slip off the sprocket to the left, between the largest sprocket and the motor hub. The derailleur should be in line with the largest sprocket, as seen in the image below.
Index gears using cable barrel adjuster
Step 1: Shift the gears so that the chain is in the highest gear, which is the smallest sprocket.
Step 2: Shift down a gear to the next largest sprocket (leftward). If the chain is skipping or does not move to the next sprocket, turn the cable barrel adjuster a quarter turn in the counterclockwise direction. Do this until skipping is gone and/or the chain shifts smoothly to the next gear. The goal is to have the derailleur in line with the corresponding gear and sprocket, as shown in the image.
Step 3: Repeat step 2 for each gear thereafter.
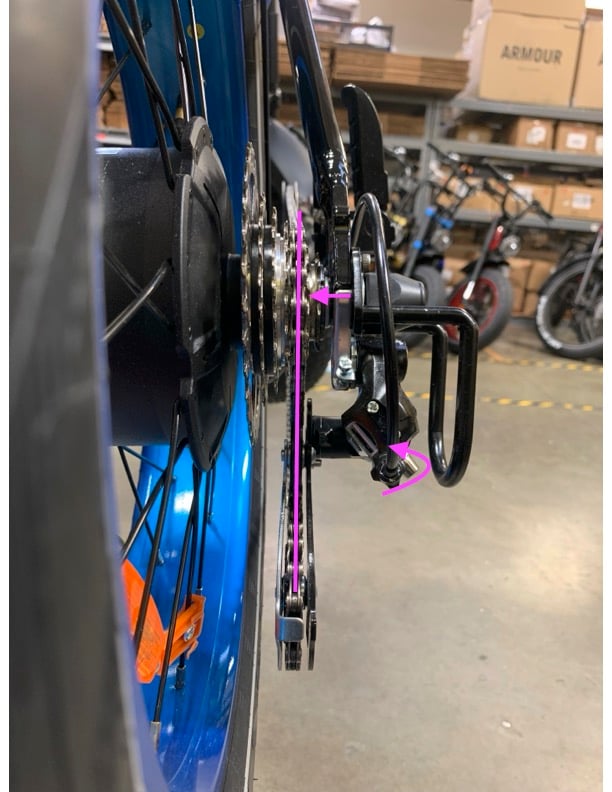
Step 4: Shift the gears so that the chain is in the lowest gear, which is the largest sprocket.
Step 5: Shift up a gear to the next smallest sprocket (rightward). If the chain is skipping or does not move down to the next sprocket, turn the cable barrel adjuster a quarter turn in the clockwise direction. Do this until skipping is gone and/or the chain shifts smoothly to the next gear. The goal is to have the derailleur in line with the corresponding gear and sprocket, as shown in the image.
If you have further questions or need clarification, please review the video below and/or reach out to Ariel Rider through our contact form, here.
The video below will show you how to adjust your derailleur.