How To Install/Replace the Tree Cable on your KeplerUpdated 2 months ago
Before removing the tree cable you're replacing, kindly follow the steps below.
First, please ensure all power is off on your bike and the battery, then follow the instructions below.
After the battery is removed, power cycle your bike. You can watch this tutorial on how to perform a power cycle on your bike.
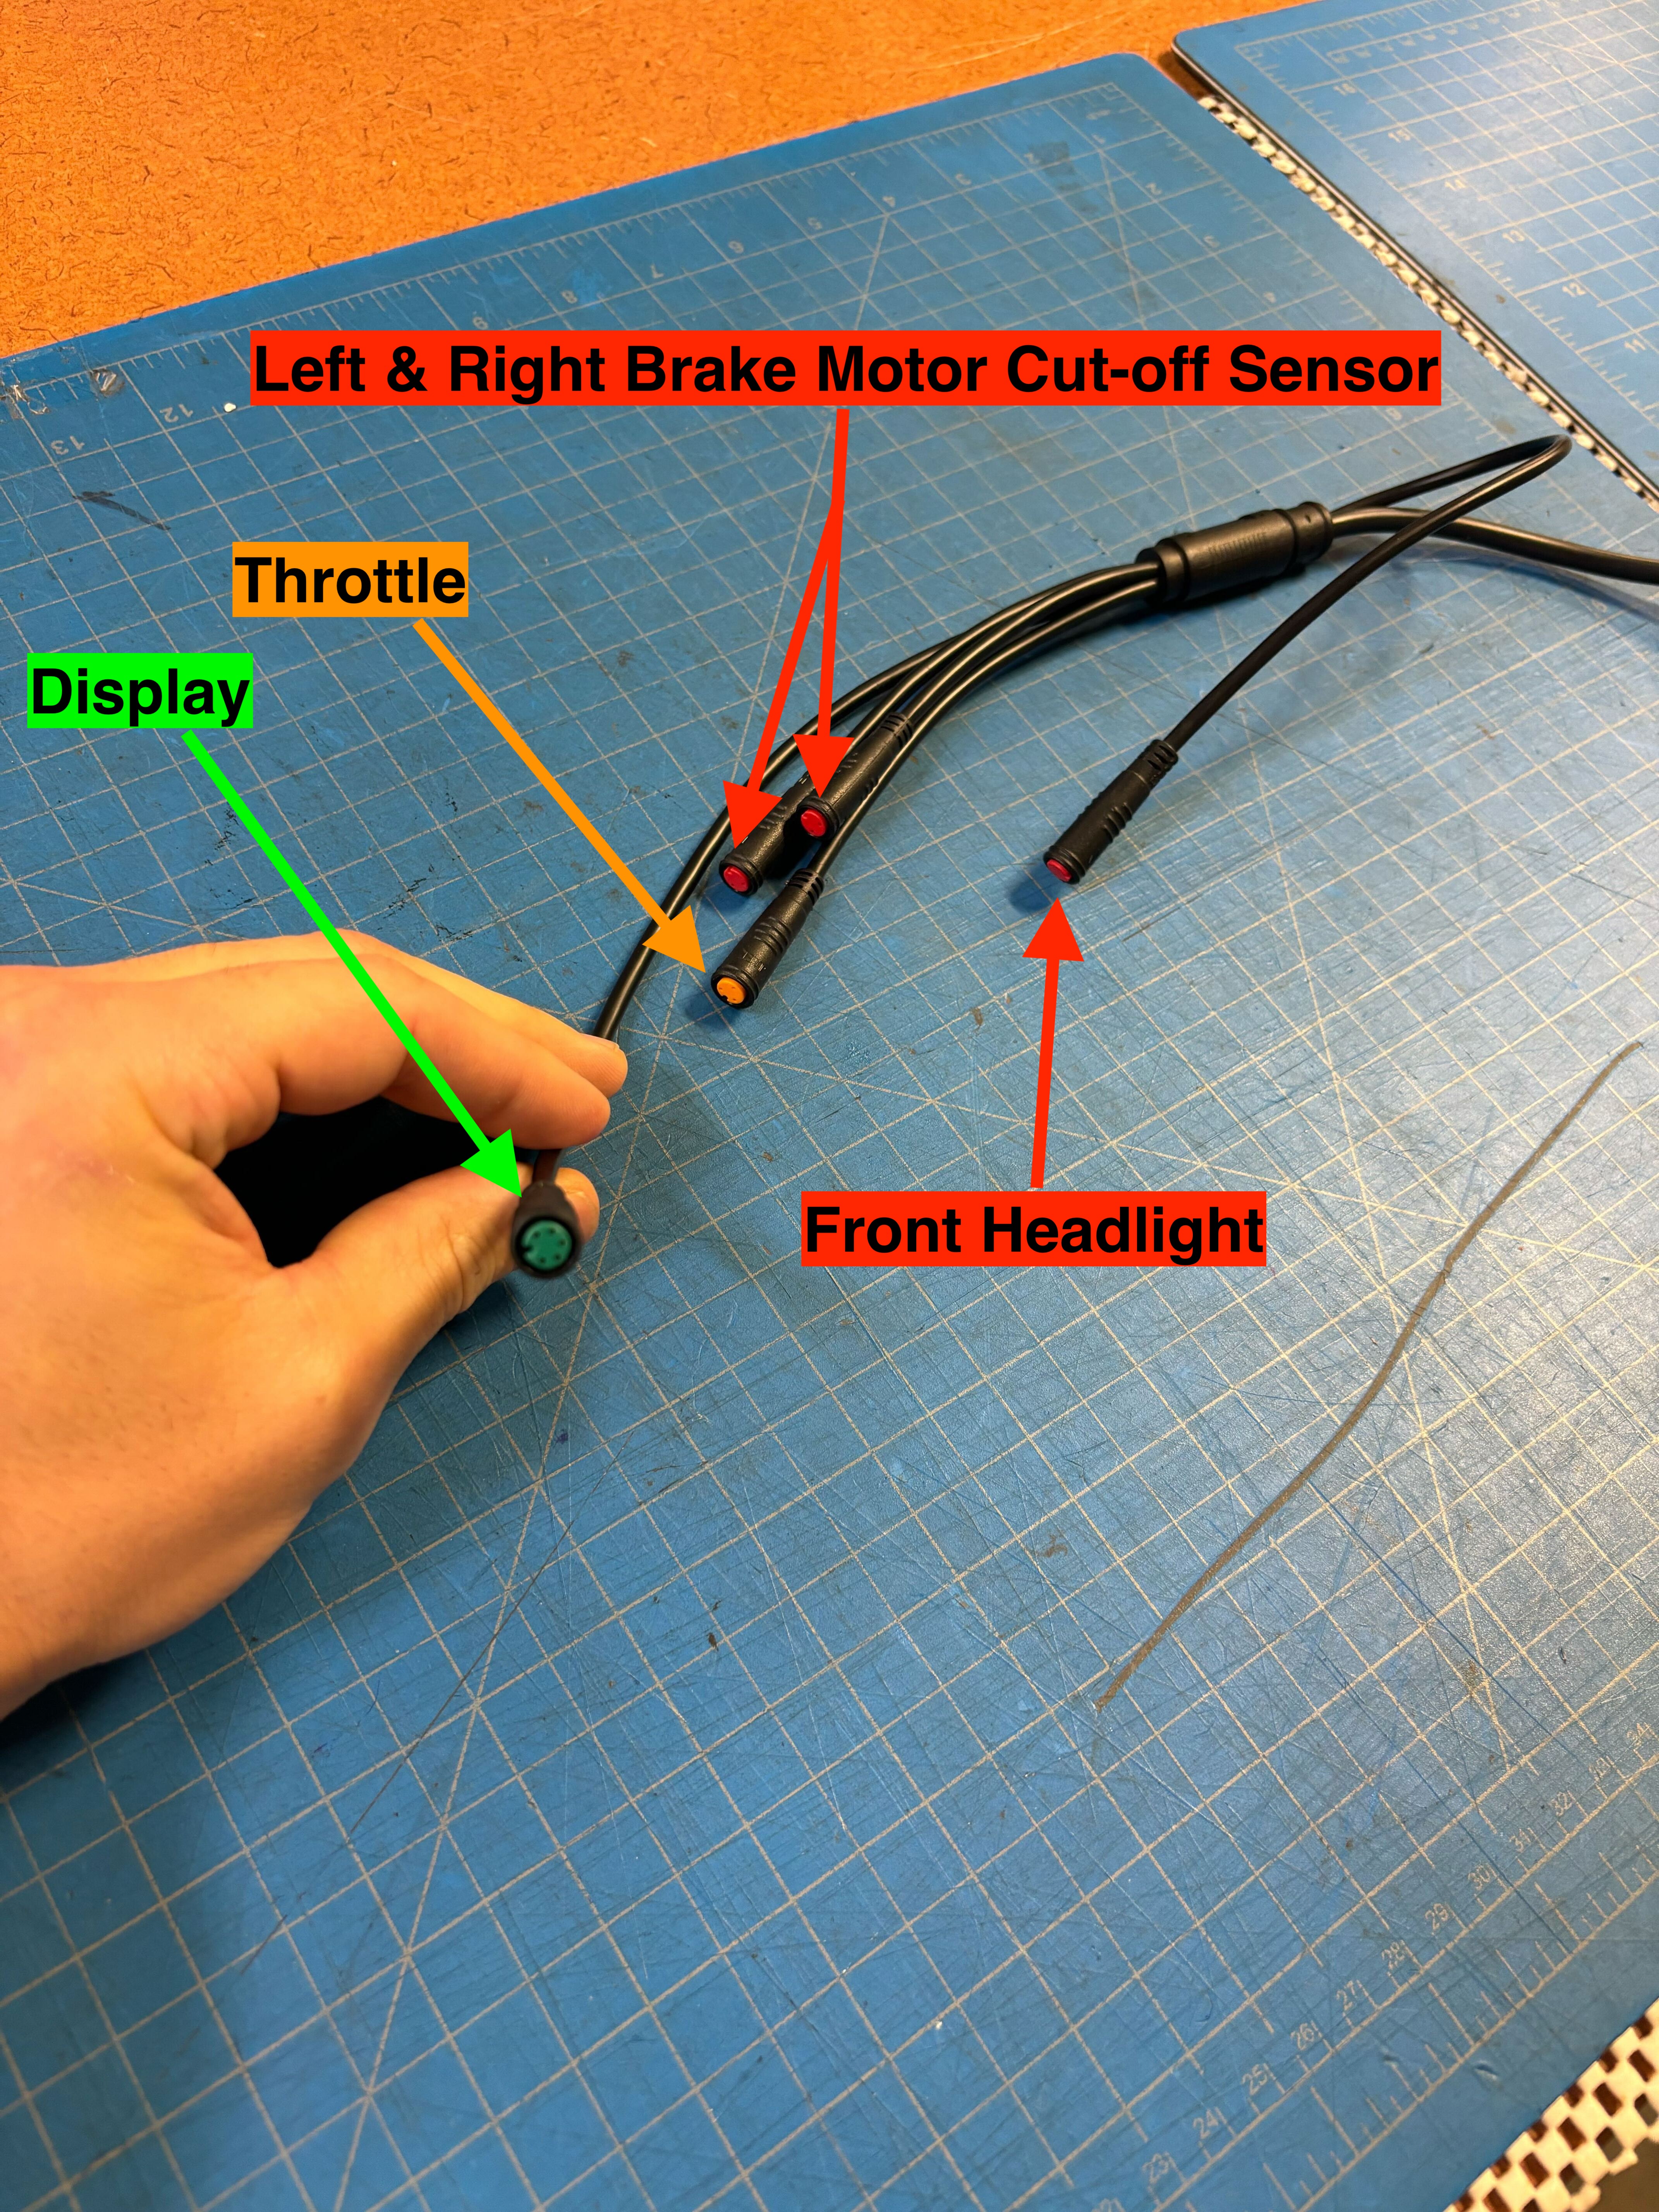
Step 1: Disconnect all of the components that are plugged into the tree cable (Display, Throttle, Front headlight, Left and Right Brake Motor cut-off Sensor) as we will be pulling the entire tree cable out of the frame.
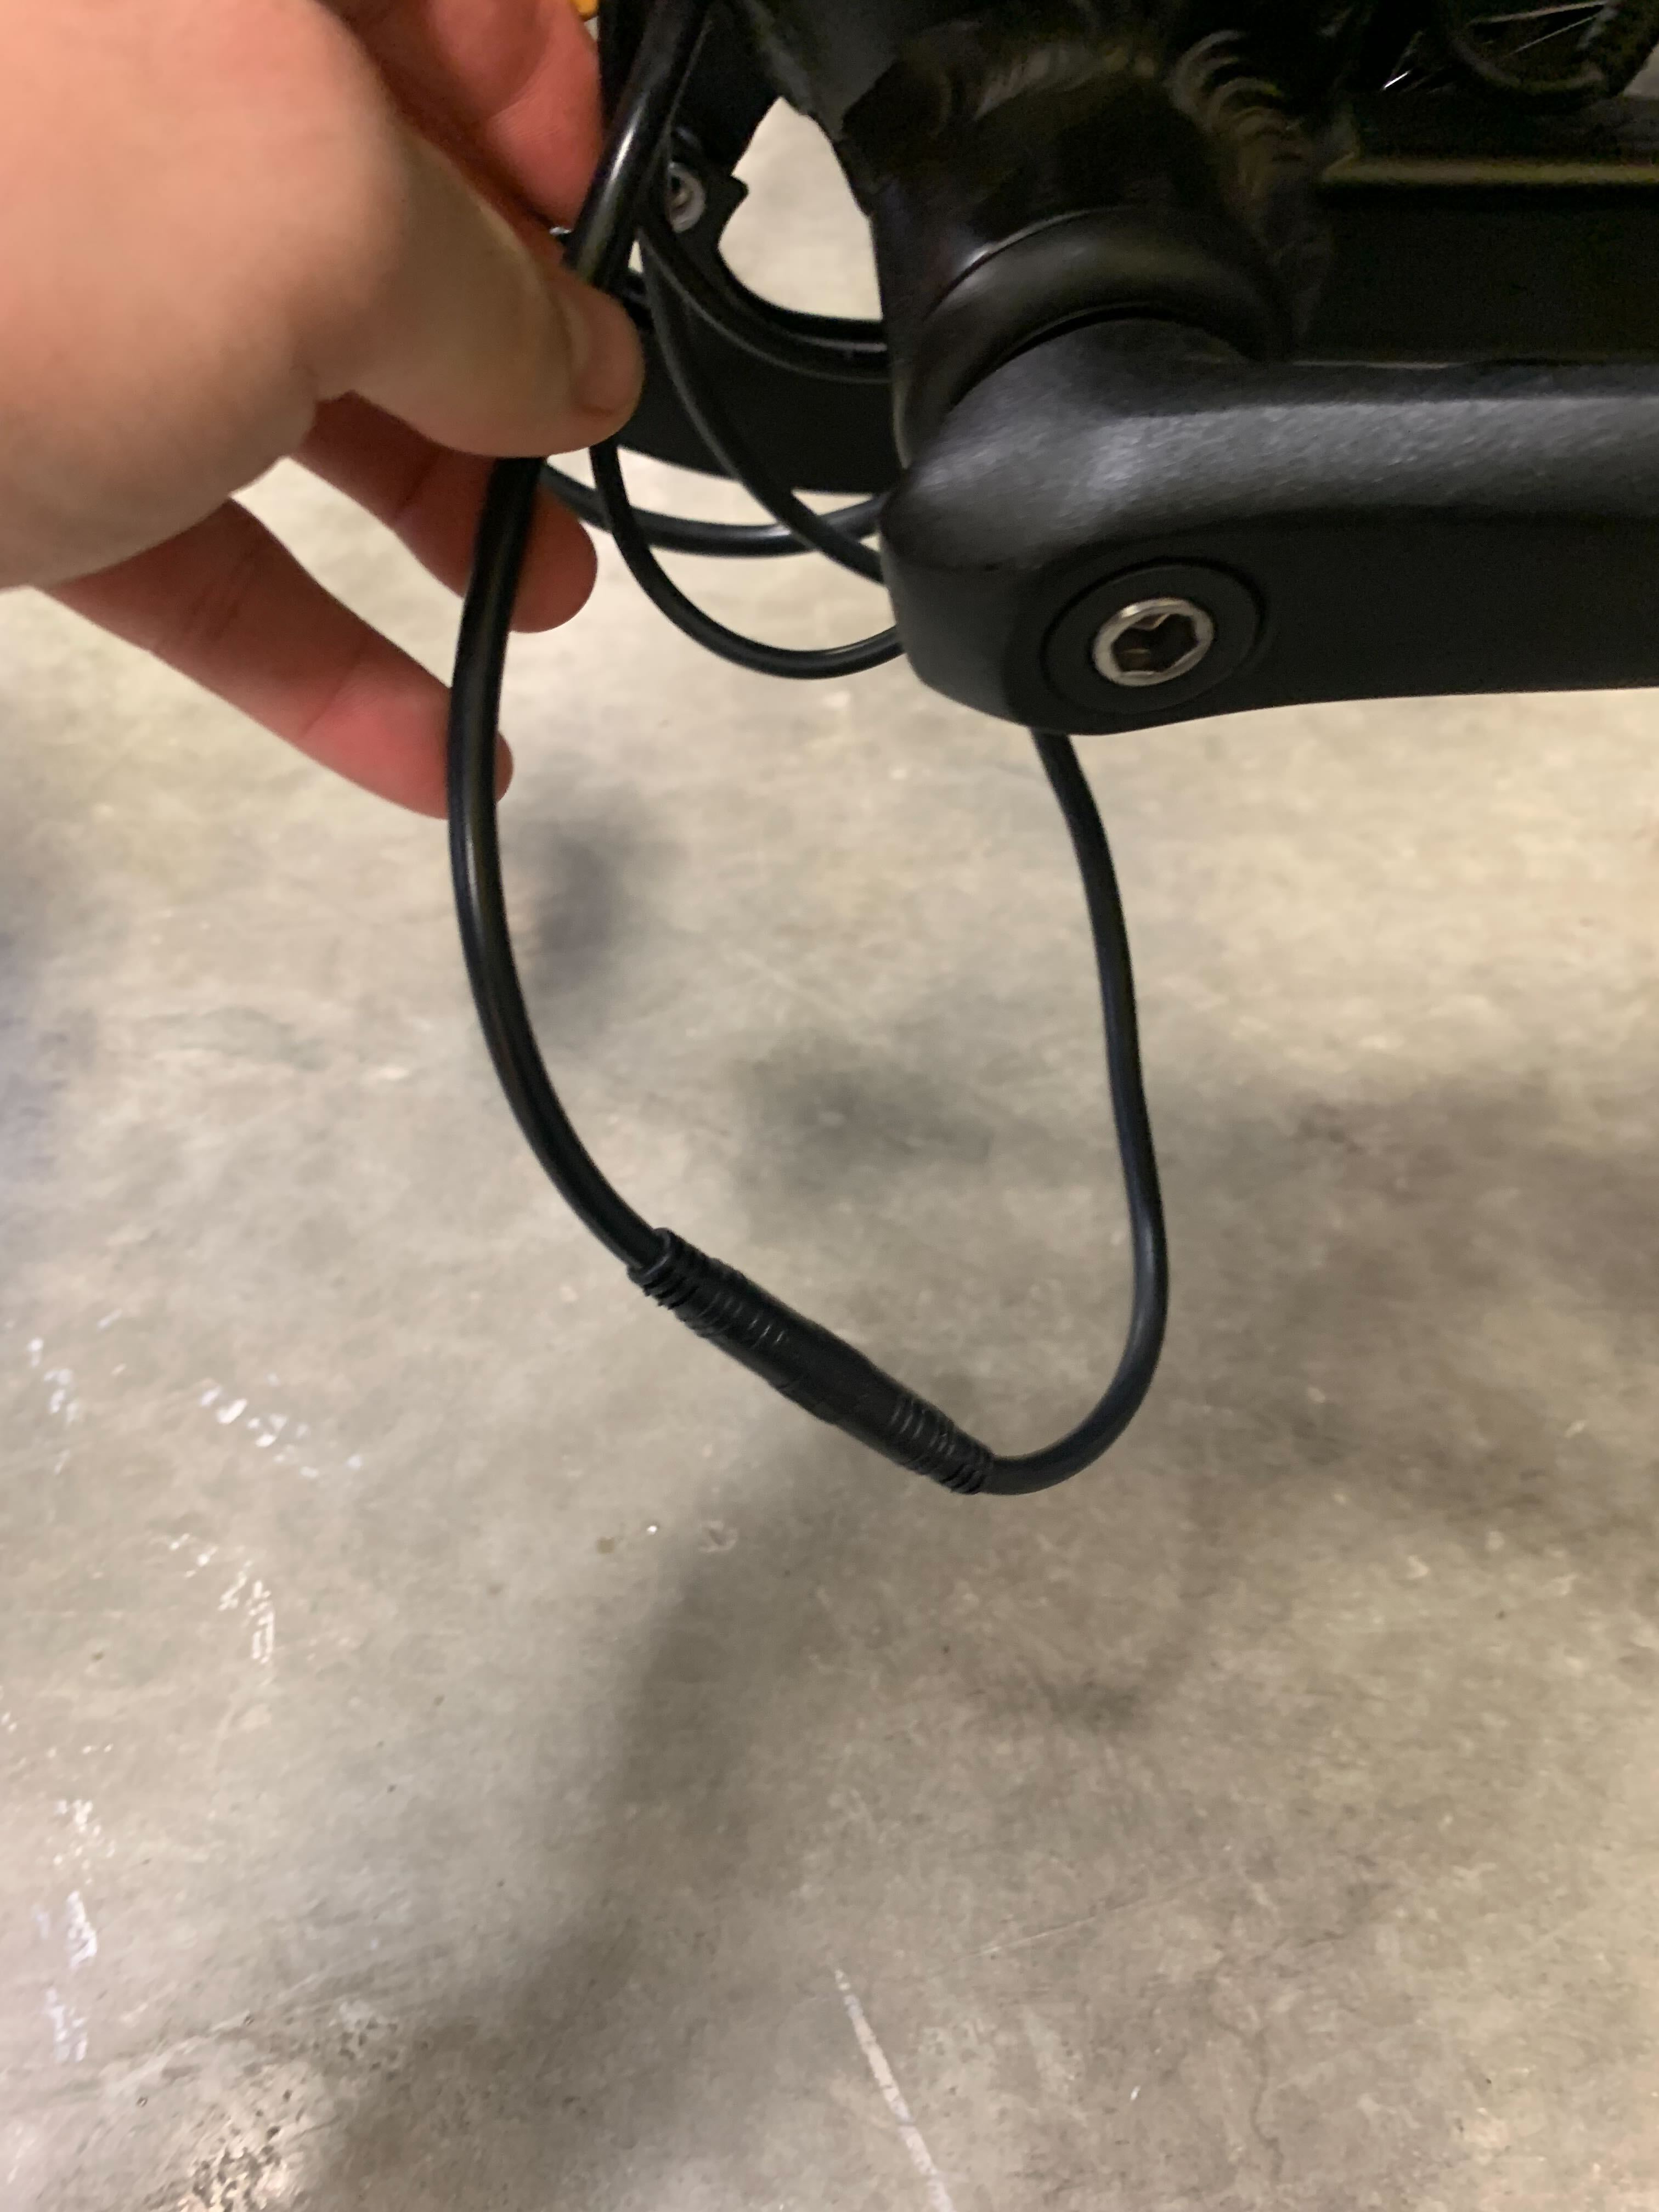
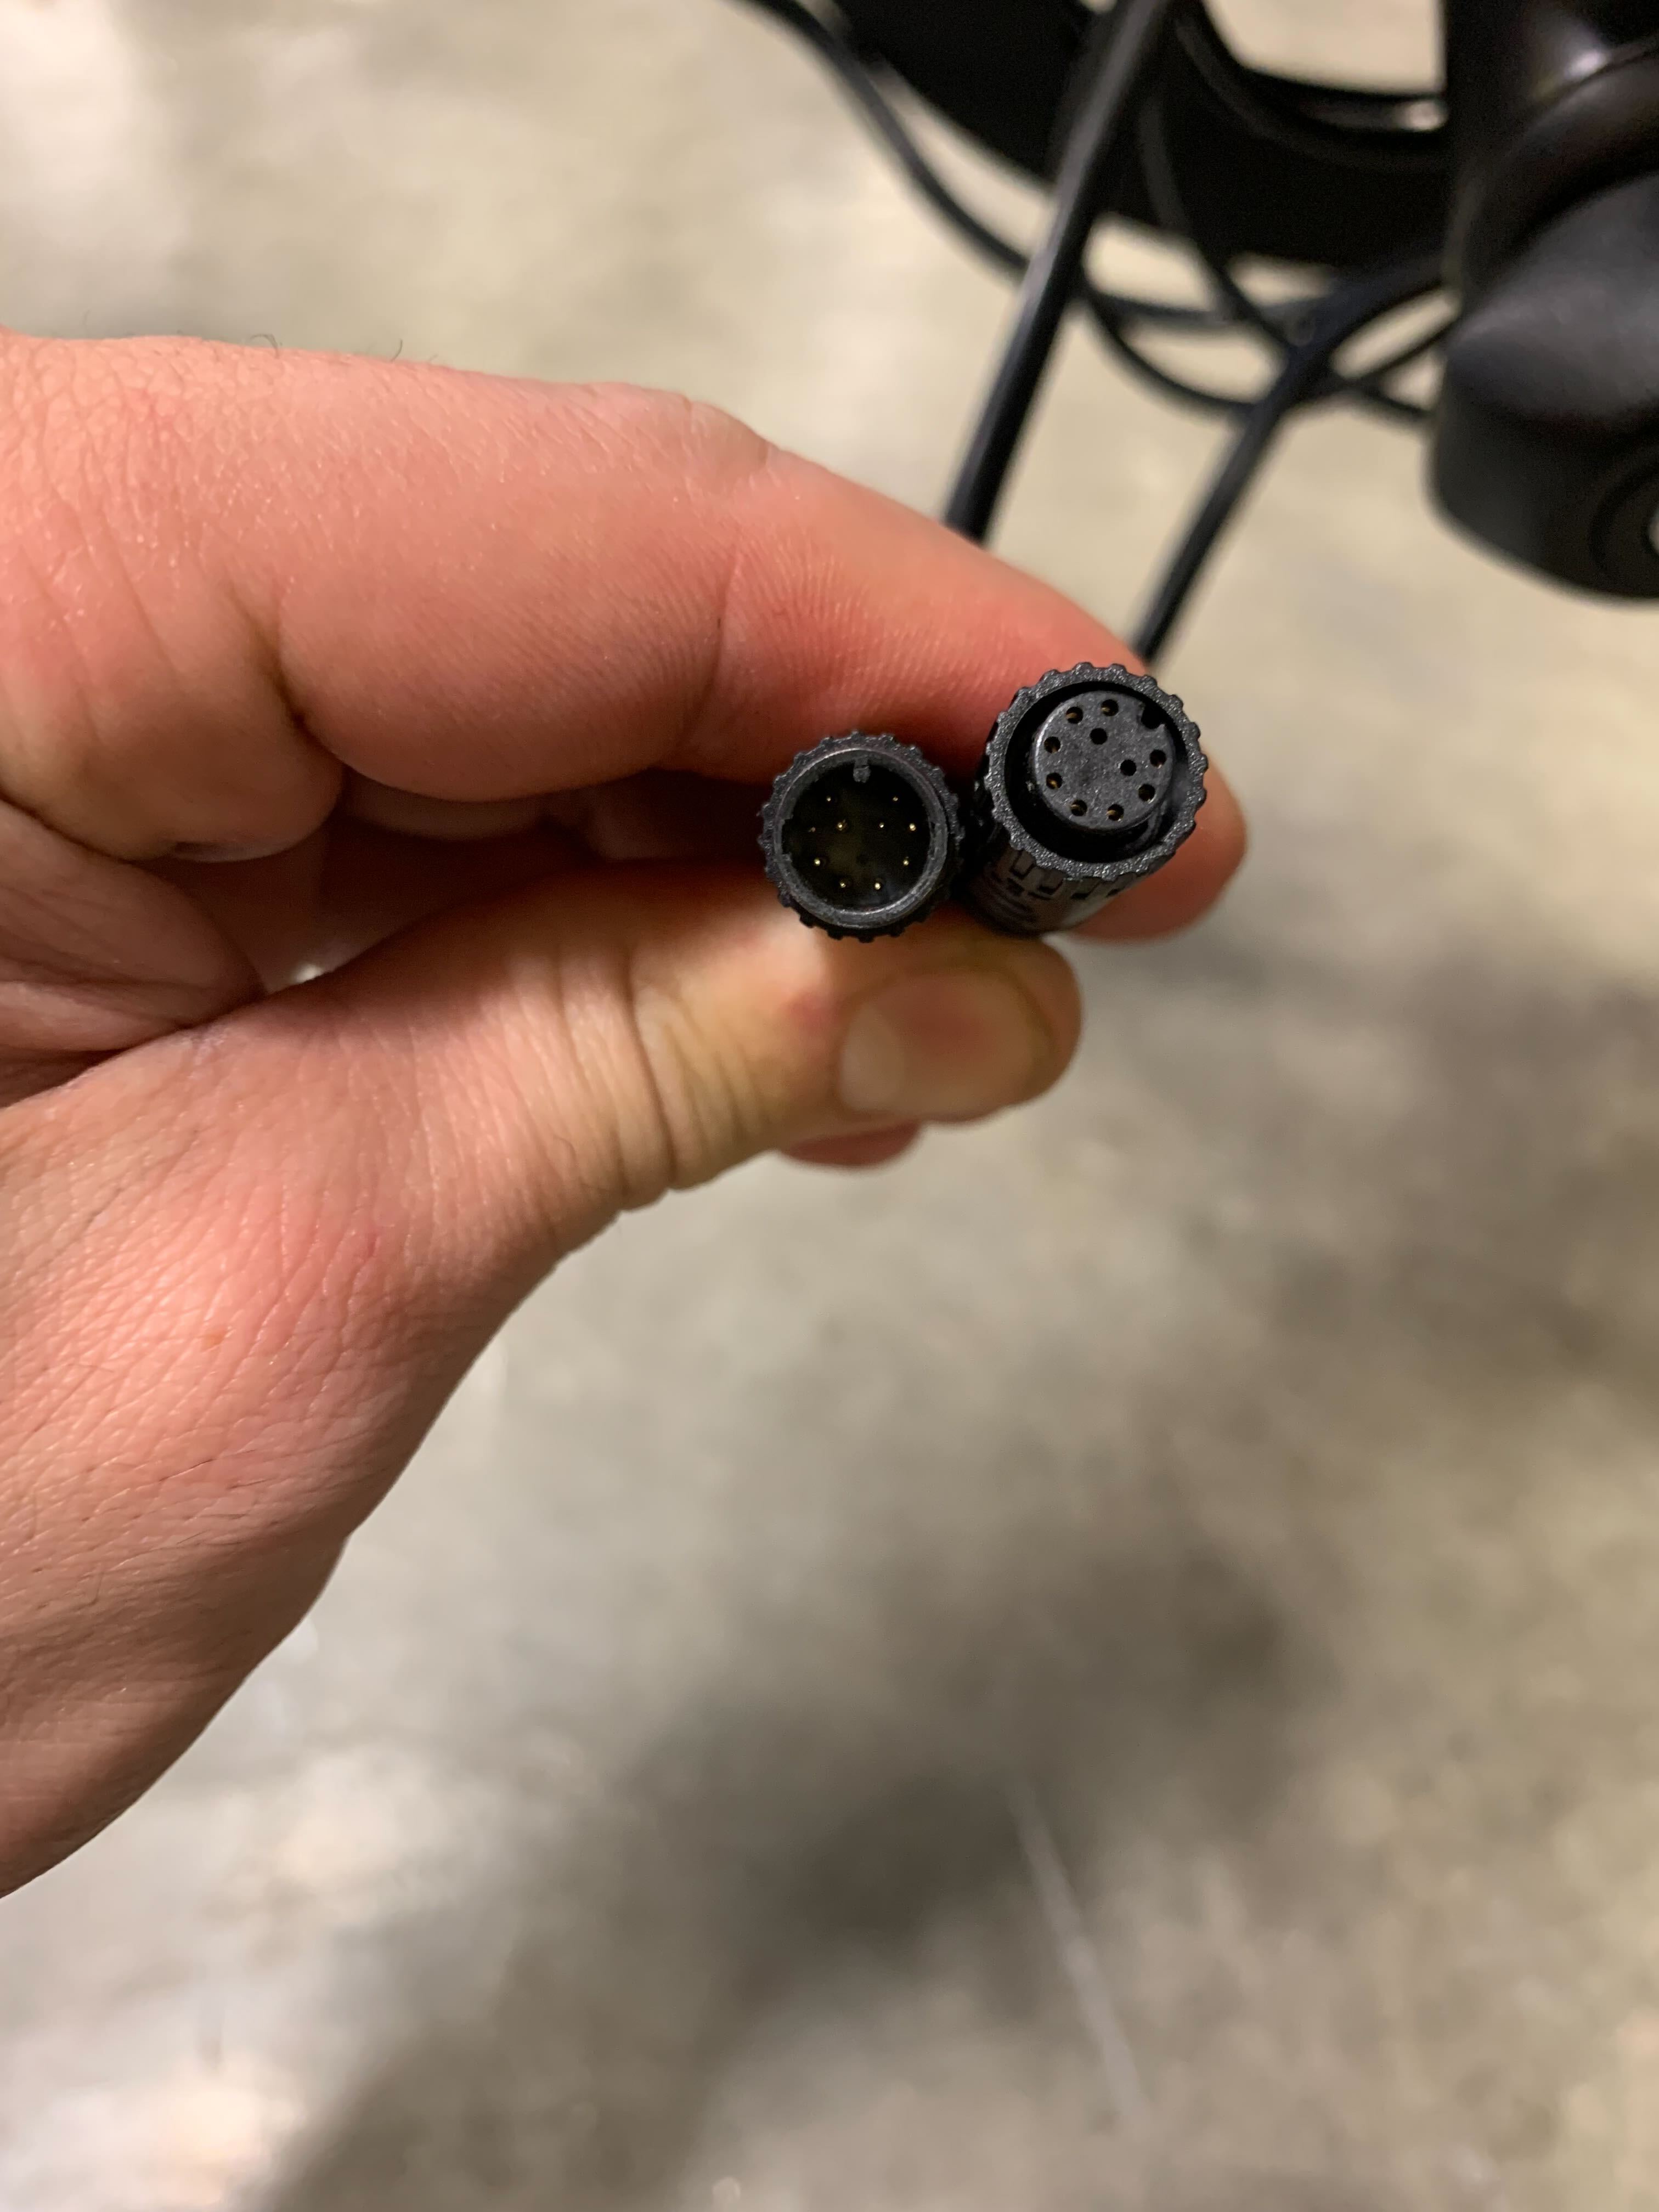
Step 2: Locate the connection between the controller and the Tree cable. This is a 10-pin connection. This can be in a hole with a rubber grommet near the bottom bracket.
Step 3: Use some electrical tape to secure a guideline to the end of the original tree cable (where it plugs into the controller), making sure that you have a very good connection.
Note: You can use something like paracord or high-test fishing line for a guideline, but our mechanic recommends something like an old shifter cable or other semi-rigid material. It’s better not to use baling wire as the sharp edges can cut the cables. You’ll want to have enough slack so once this feeds through the frame, you can attach a new tree cable and use this to help guide that back through the frame. ~4 feet would be recommended.
Step 4: Once this guideline is attached, come around to the front of the bike and pull the tree cable through the frame of the bike and out the front.
Step 5: Attach the controller end of the new tree cable to the guideline that you just pulled through the frame.
Step 6: Begin feeding the cable into the frame. It is best to take your time and do this carefully. When the cable appears to be stuck, pull. Push it back just a bit (this is why we recommend something semi-rigid) and then push it forward again, this should help get the tree cable around any obstruction.
Step 7: Once successfully pulled through the frame, attach the new tree cable to the controller.
Step 8: Once the new tree cable is connected to the controller, then go ahead and securely attach all remaining connections to the tree cable. Please ensure that all connections are properly aligned as to not cause damage.
Step 9: From here, you can go ahead and reinsert the battery, power your bike on, and enjoy your ride!