
Kepler 52V - 2026: Display SettingsUpdated 2 months ago
The Kepler 52V features an advanced display that allows you to customize your riding experience, monitor dual-battery levels, and secure your e-bike with a custom password.
1. The Keypad Layout
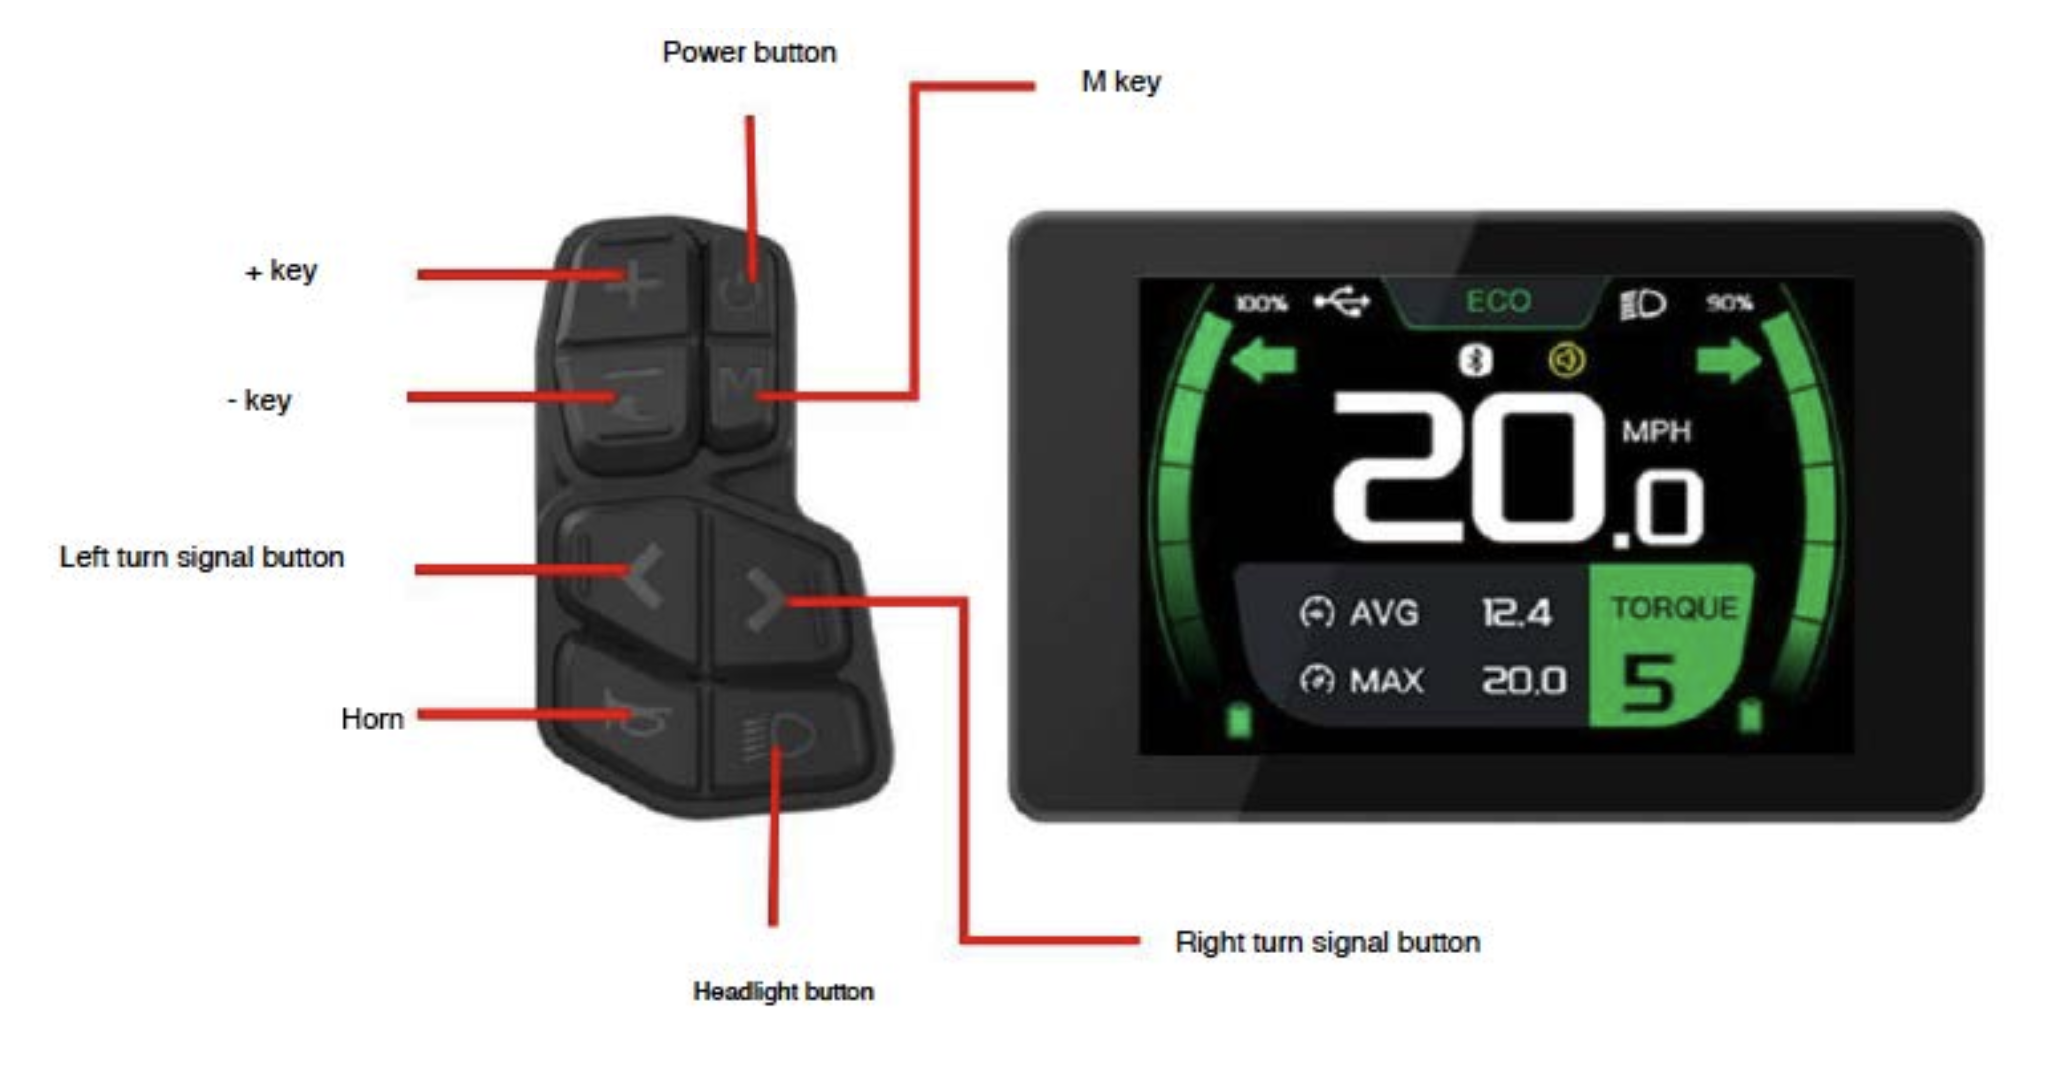
Familiarize yourself with the handlebar controls before adjusting settings:
- Power Button: Press and hold to turn the display and motor systems on or off.
- "+" and "-" Keys: Increase or decrease pedal assist levels (PAS), navigate menu screens, or change parameter values.
- M Key: Short-press to cycle through trip metrics (TRIP, ODO, MAX, AVG); long-press to enter the main settings menu.
- Light / Horn / Signals: Dedicated physical switches for headlights/taillights, horn activation, and turn signals.
2. Entering & Navigating the Settings Menu
- Power On: Press and hold the Power Button for 3 seconds.
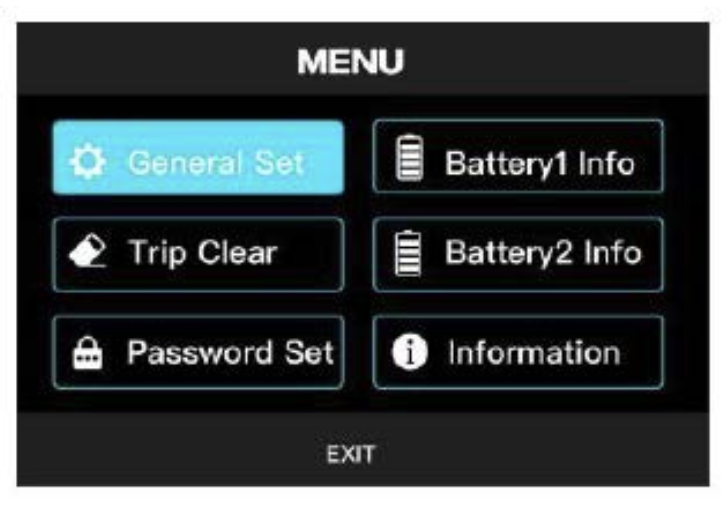
- Access Menu: Long-press the M Key to enter the first-level configuration menu.
- Navigate: Press "+" or "-" to highlight menu icons, then short-press the M Key to select an item.
- Exit: Select "RETURN" or "EXIT" to save choices and return to the main riding interface.
3. Key Advanced Settings
| Setting | Description | Instructions |
|---|---|---|
| Password Set | Requires a passcode before allowing the bike to power up and operate. | Navigate to Password Set > PWD1 SET to enable. Use PWD1 ADJ to set your passcode. Note: Record or take a photo of your passcode. If lost or forgotten, the display must be replaced. |
| Sensor Selection | Switch between Torque sensor (natural proportional assist) and Cadence sensor (consistent speed power). | From the main riding interface, long-press the "+" key to instantly toggle sensor modes. |
| Ride Mode | Adjusts system power output profiles. | Simultaneously press and hold "+" and "M" on the main interface to cycle between ECO, TRAIL, and BOOST modes. |
| Mileage Reset | Clears trip distance for a new ride. | Navigate to Trip Clear, select the Clear Icon, and press the M Key to confirm. |
| Unit & Brightness | Customizes display units and backlight intensity. | Enter General Set to switch between MPH/KMH or adjust display brightness from level 1 (darkest) to 5 (brightest). |
4. Important Display Indicators
- Dual Battery Levels:Displays independent live capacity levels and percentage readouts for both Battery 1 and Battery 2 when connected.
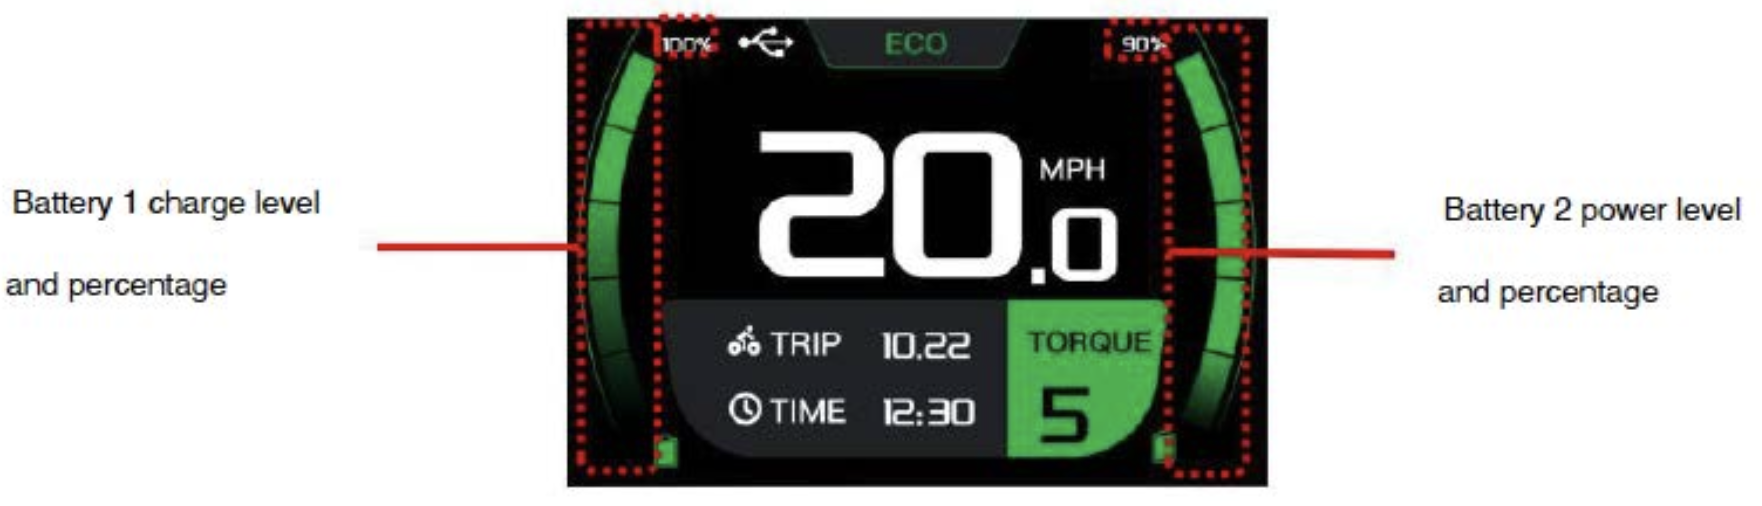
- USB Charging: Displays a active USB indicator when a mobile device is connected to the display's USB-C port. Note: Unplug external devices when the bike is powered down.
- Bluetooth Connection: Confirms active pairing between the display and the official Ariel Rider mobile app.
WARNING: Do NOT change "System Voltage" or "Wheel Size" parameters in the display settings. These values are factory-calibrated for proper speedometer accuracy and safe 52V motor operation.
Need Additional Help?
If you need assistance configuring display settings or clearing a forgotten passcode, please contact our technical support team through our contact form.