Kepler Dual Battery: Display SettingsUpdated 5 months ago
The Kepler 52V features a sophisticated display that allows you to customize your riding experience, monitor dual-battery levels, and secure your bike with a password.
1. The Keypad Layout
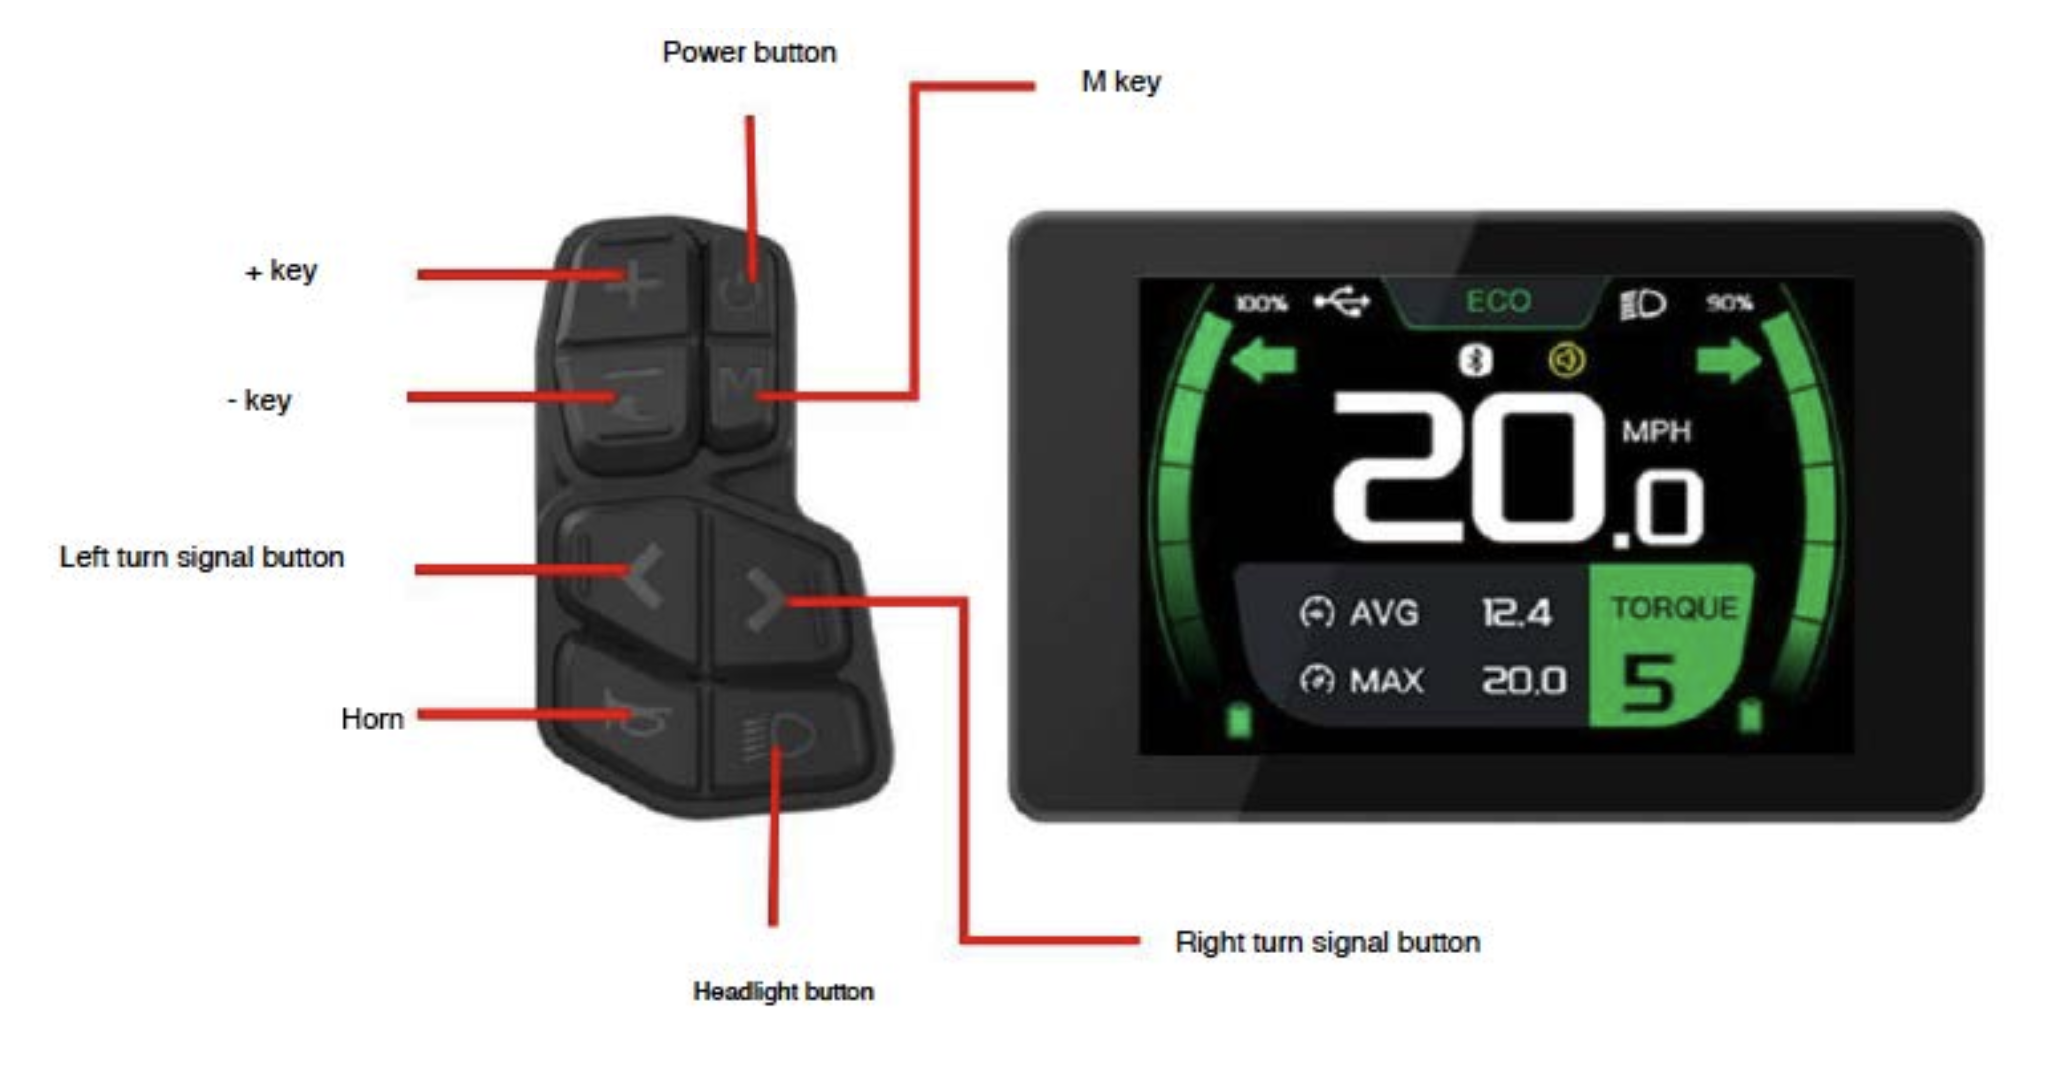
Before diving into settings, familiarize yourself with the handlebar keypad:
Power Button: Turns the display and motor on or off.
"+" and "-" Keys: Increase or decrease your pedal assist levels.
M Key: Used to cycle through trip data and enter the settings menu.
Light/Horn/Signals: Dedicated buttons for your high/low beams, horn, and turn signals.
2. Entering the Settings Menu
To customize your bike's parameters:
Power On: Press and hold the power button for 3 seconds.
Access Menu: Long-press the M Key to enter the first-level menu.
Navigate: Use the "+" or "-" keys to highlight an icon, and short-press the M Key to select it.
Exit: Select "RETURN" or "EXIT" to go back to the main riding screen.
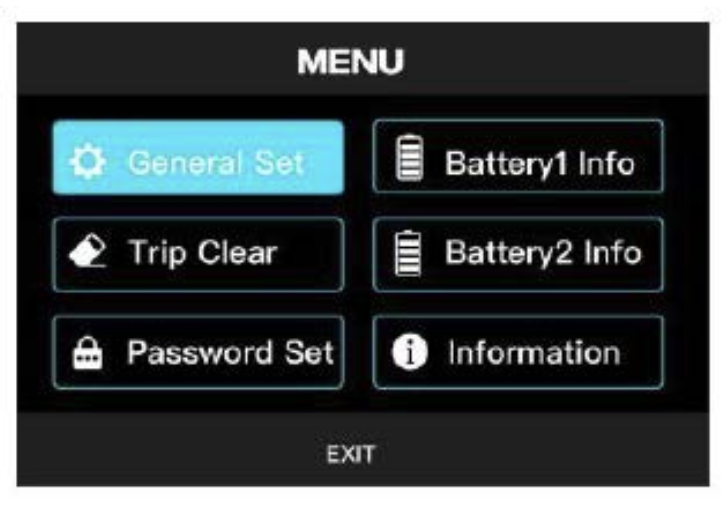
3. Key Advanced Settings
Setting | Description | Instructions |
Password Set | Adds an extra layer of security by requiring a code to start the bike. | Go to Password Set > PWD1 SET to enable. Use PWD1 ADJ to set your code. Note: Take a photo of your code; if you forget it, the display must be replaced. |
Cadence/Torque Sensor | Switch between Torque (natural feel) and Cadence (consistent power) sensors. | From the main menu, long-press the "+" button to swap modes instantly. |
Ride Mode | Changes the power delivery profiles. | Simultaneously press and hold "+" and "M" on the main interface to switch between ECO, TRAIL, and BOOST modes. |
Mileage Reset | Clears your "Trip" distance for a new journey. | Navigate to Trip Clear, select the Clear icon, and press the M Key to reset to zero. |
Unit/Brightness | Adjusts display visibility and measurement units. | Enter General Set to switch between MPH/KMH or adjust screen brightness from 1 (darkest) to 5 (brightest). |
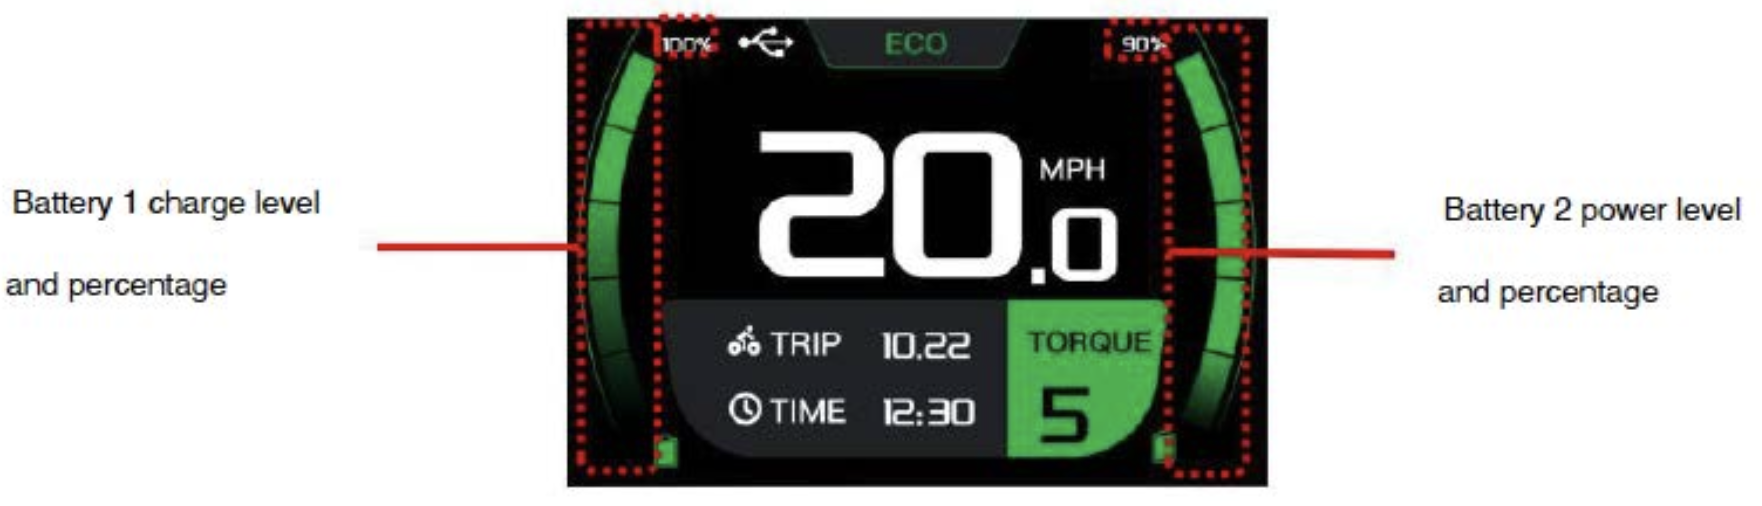
4. Important Display Icons
Dual Battery Levels: When both batteries are connected, the display shows independent charge percentages and levels for Battery 1 and Battery 2.
USB Charging: A USB icon appears when a device is charging via the Type-C port. Note: Unplug devices when the bike is off.
Bluetooth: This icon indicates a successful connection to the Ariel Rider app.
WARNING: Do NOT change the "System Voltage" or "Wheel Size" settings in the menu. These are factory-set to ensure your speedometer is accurate and your motor operates safely within its 52V limits.