
Splash Guard installation || Ariel Rider X-Class 60VUpdated 2 months ago
This pictorial guide demonstrates how to install the Fender Splash Extender (FSE) on your X-Class 60V electric motorized bike. This accessory features versatile mounting options and can be configured at various angles. These instructions follow the standard installation setup shown on our website.
CRITICAL WARNING: Always power cycle—Dissipate Controller Energy (DCE)—your electric motorized bike before performing installation or maintenance work near electrical components. Step-by-step guidance is available in our Power Cycle (DCE) Guide.
Required Tools & Package Contents
Required Tools:
- 21mm wrench or socket
- 10mm wrench or socket
- 5mm hex key (Allen wrench)
- 4mm hex key
In the Box:
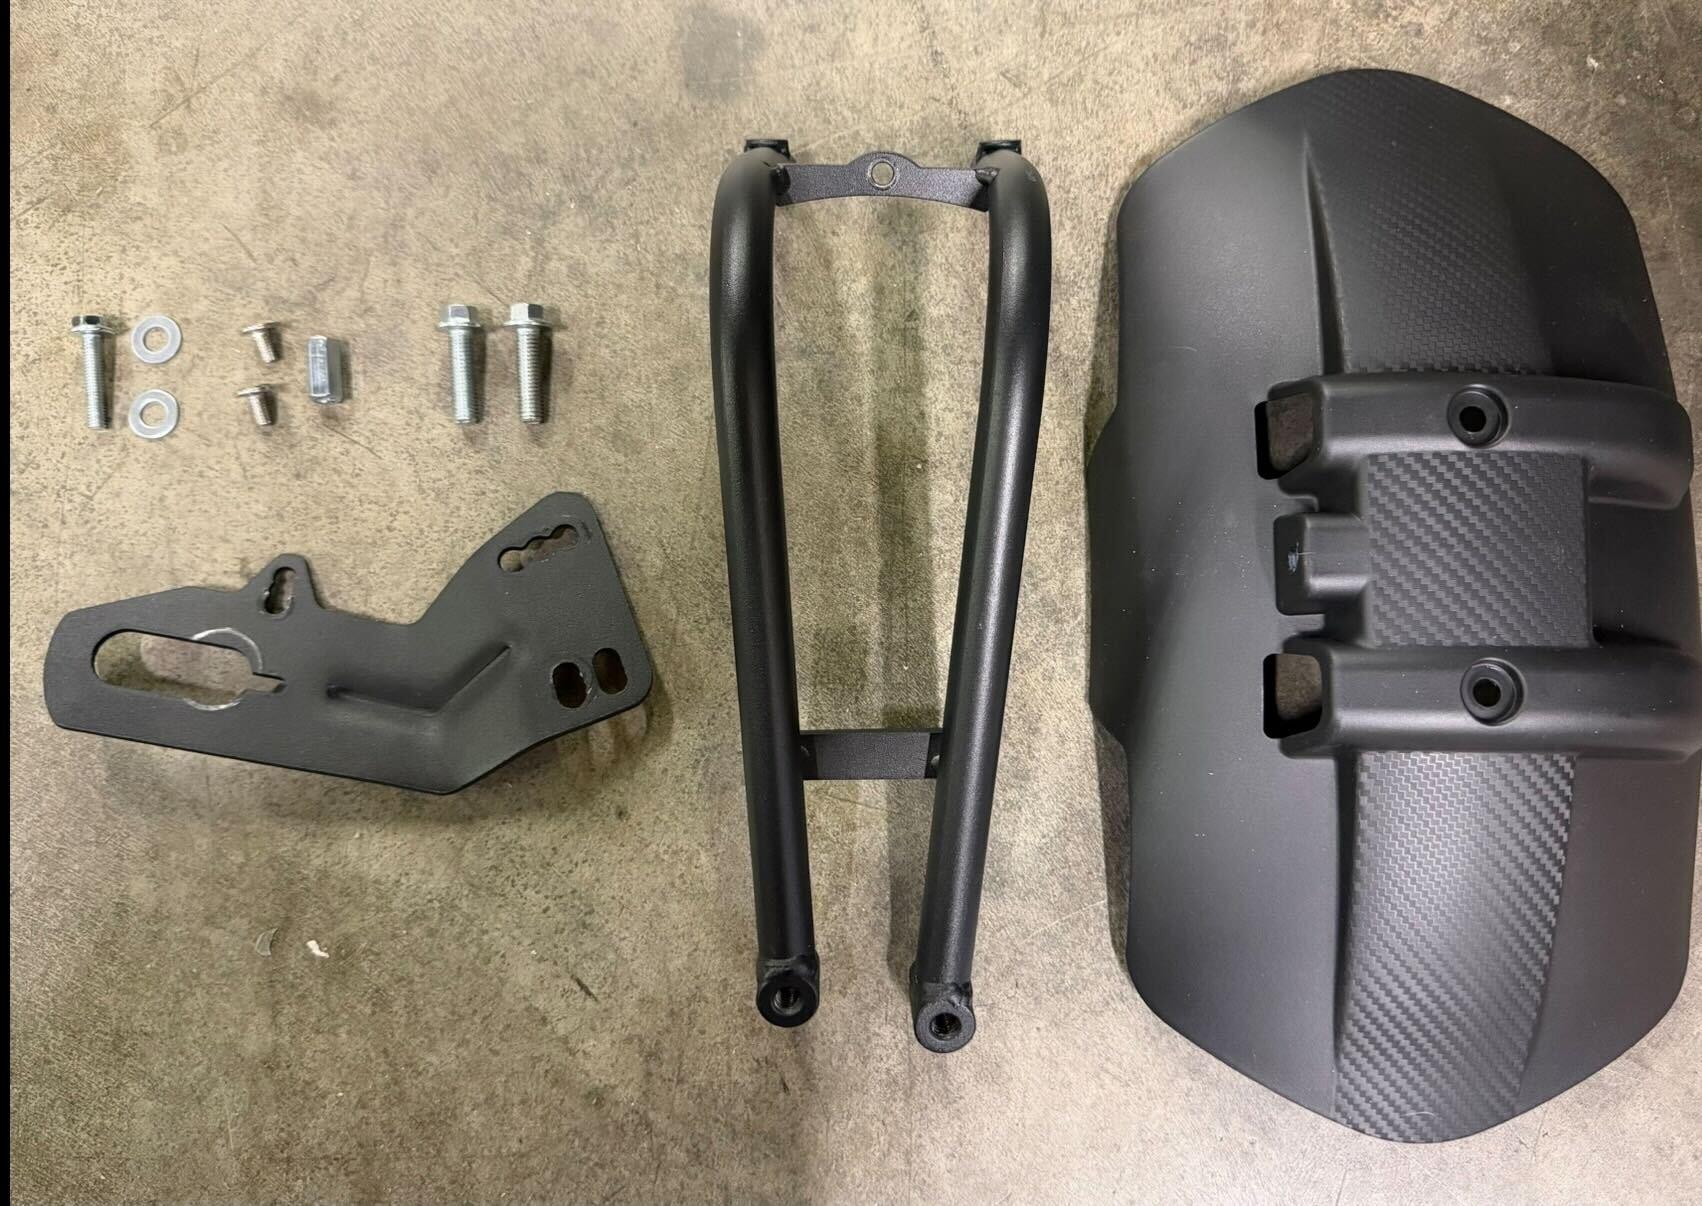
- Mounting hardware pack
- Mounting bracket
- Fender arm
- Splash guard
Step-by-Step Installation Instructions
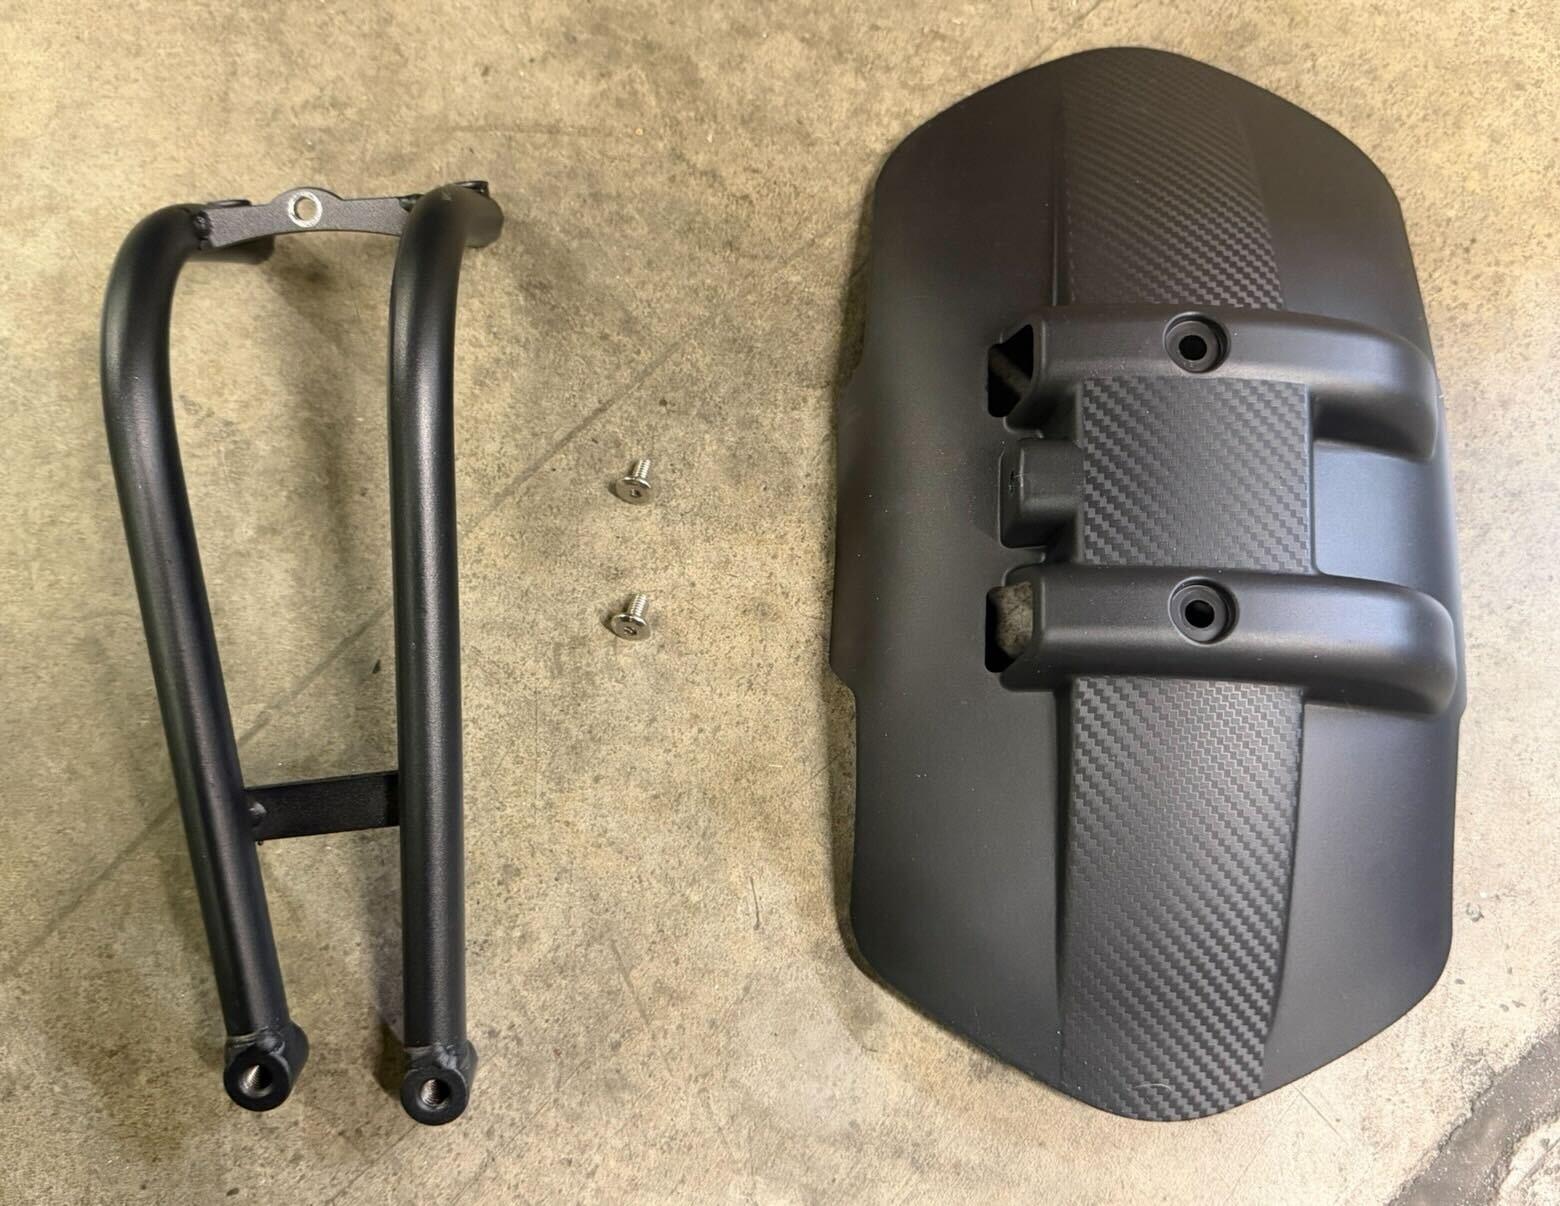
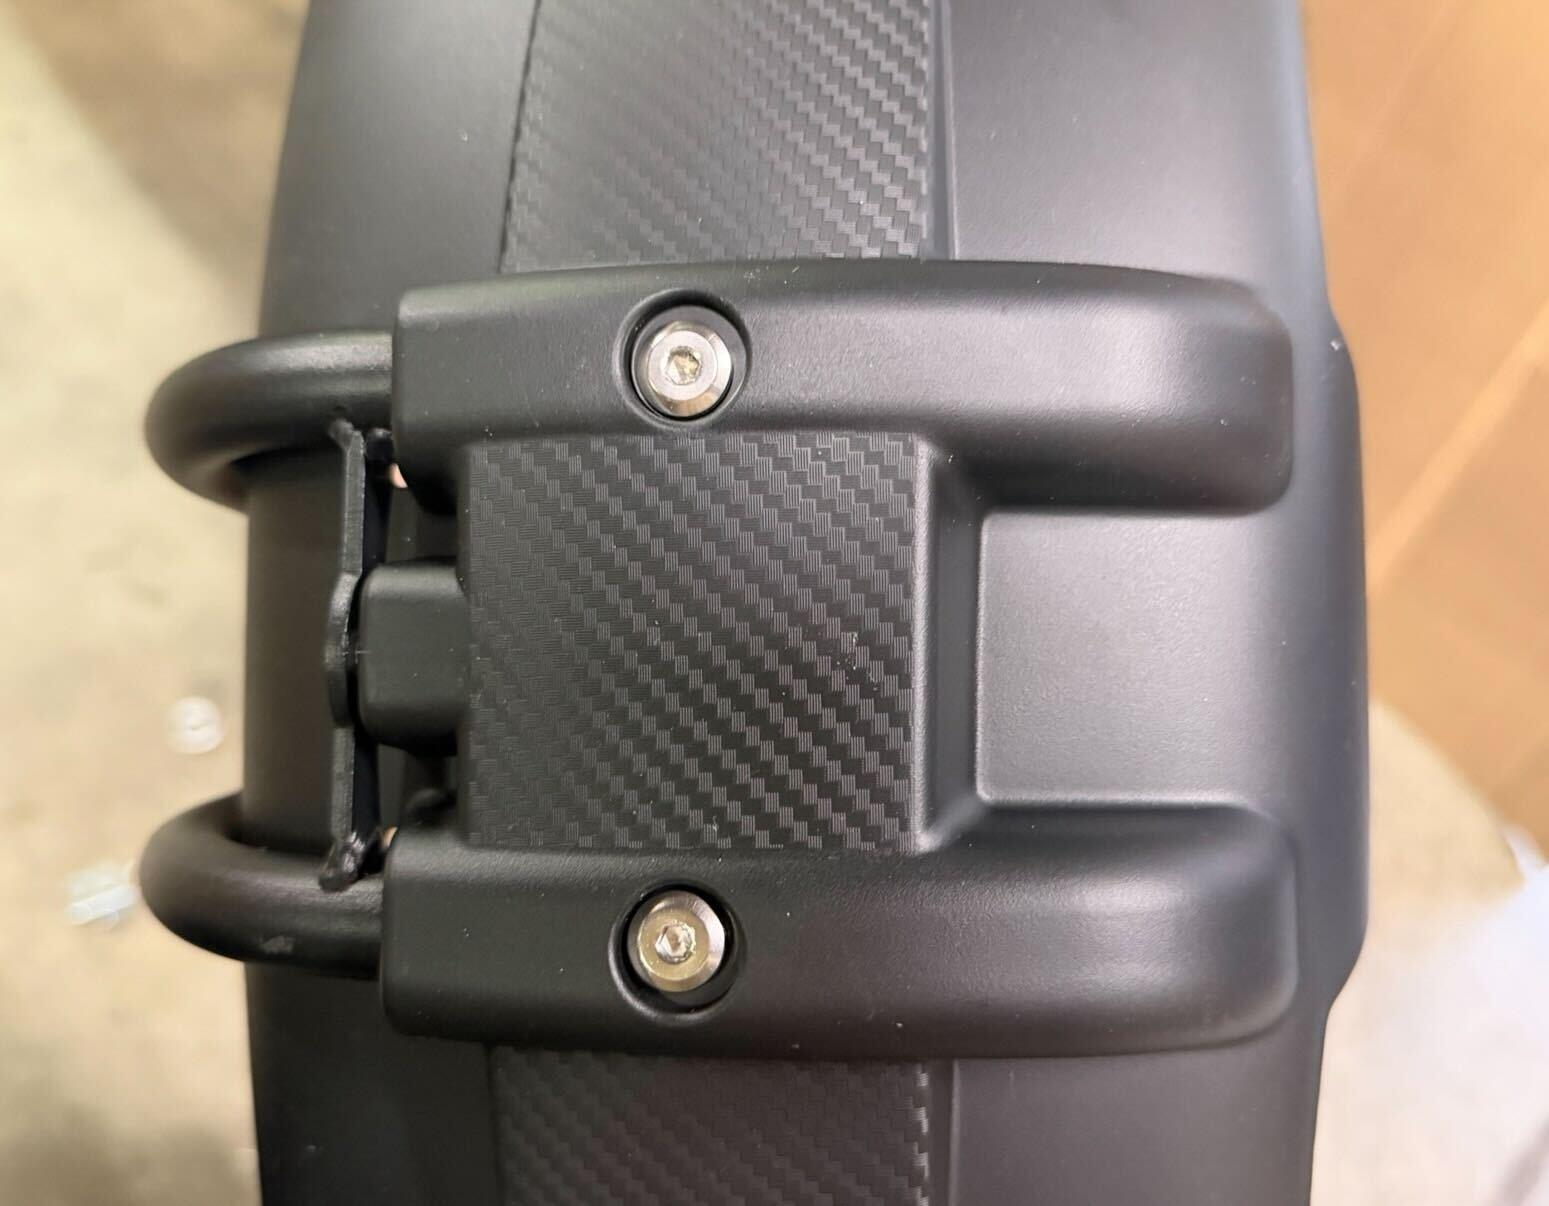
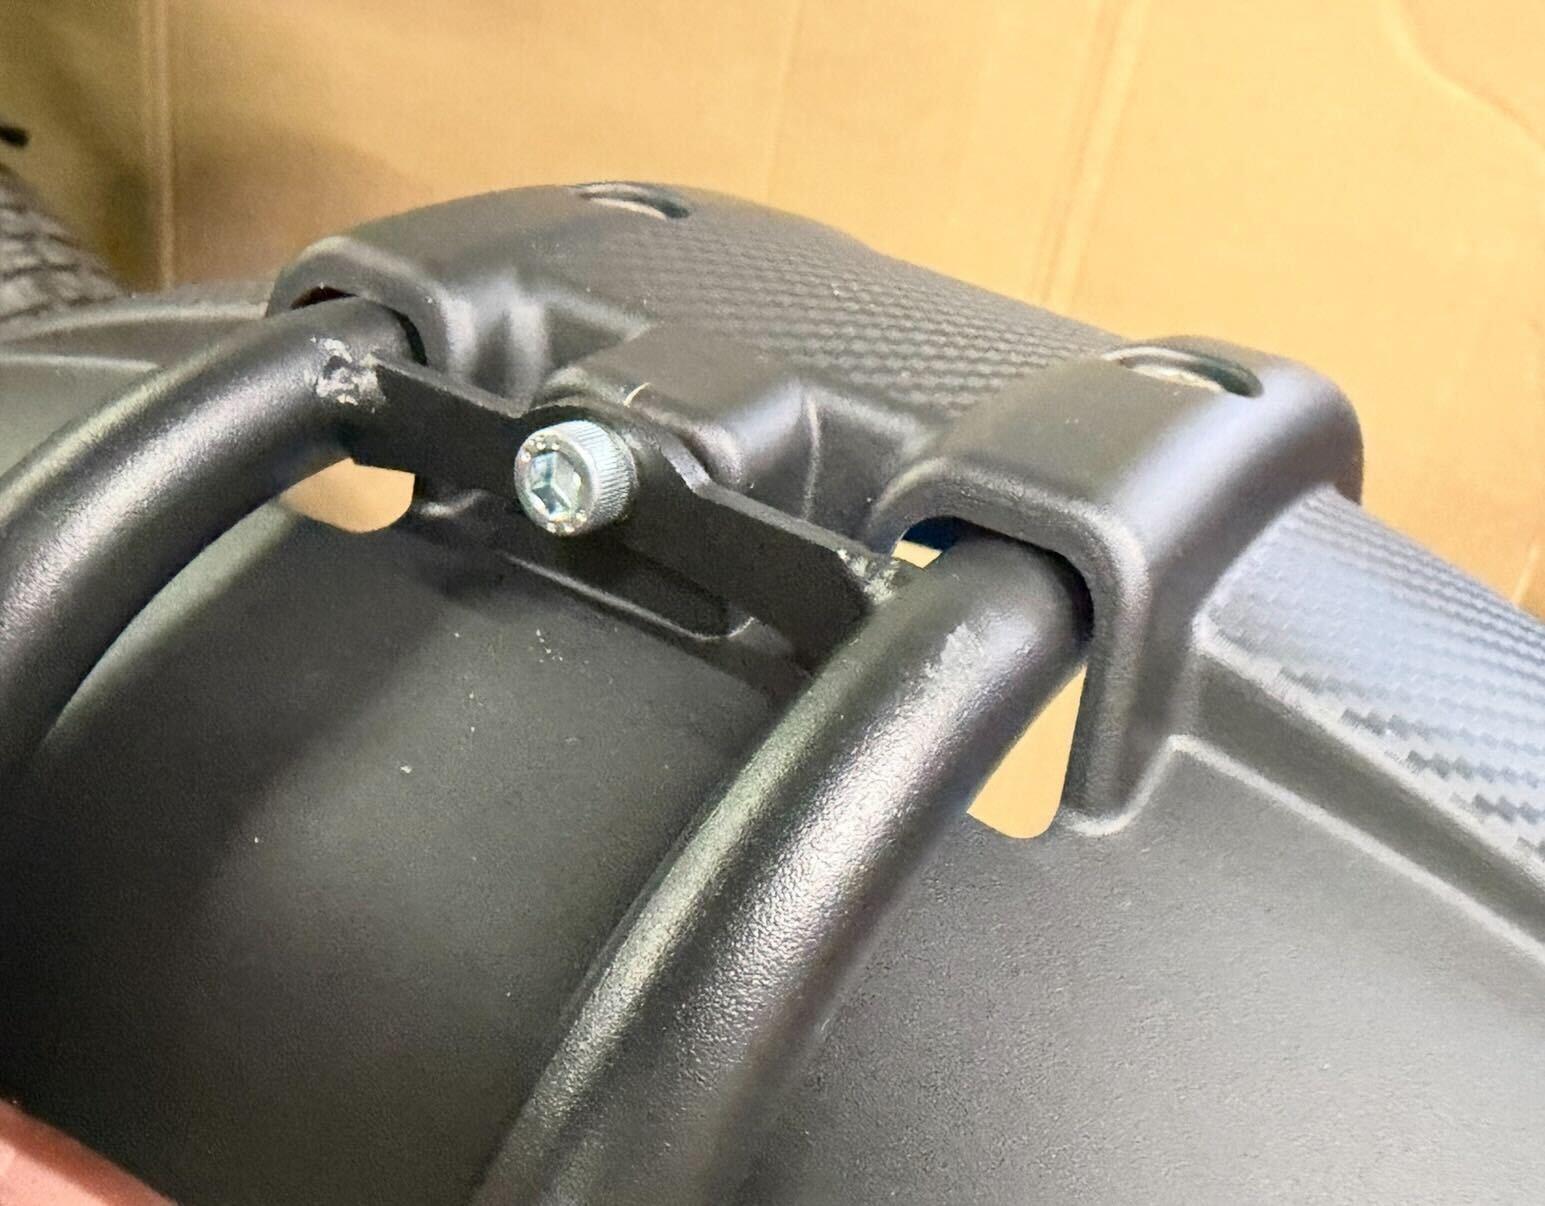
- Assemble Fender Arm to Splash Guard:
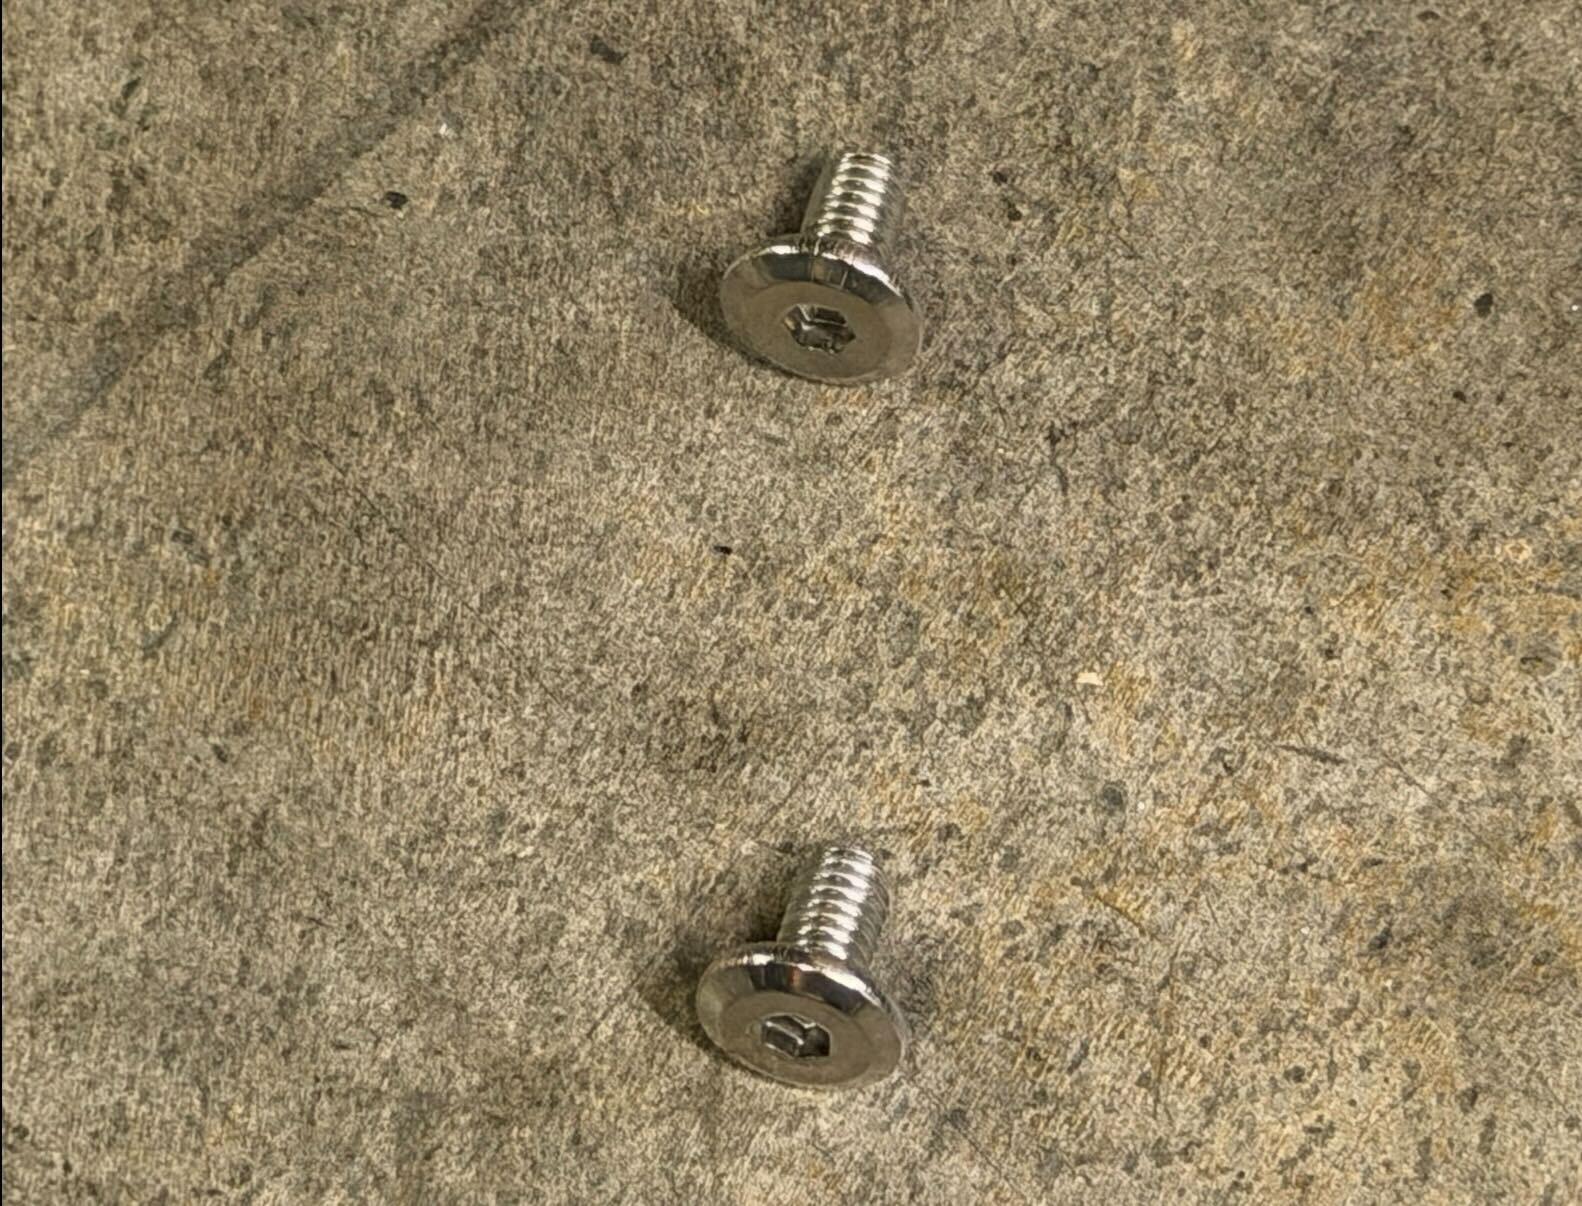
Mount the fender arm to the splash guard using the two included M6 bolts and a 4mm hex key.
- Remove Left Axle Nut:
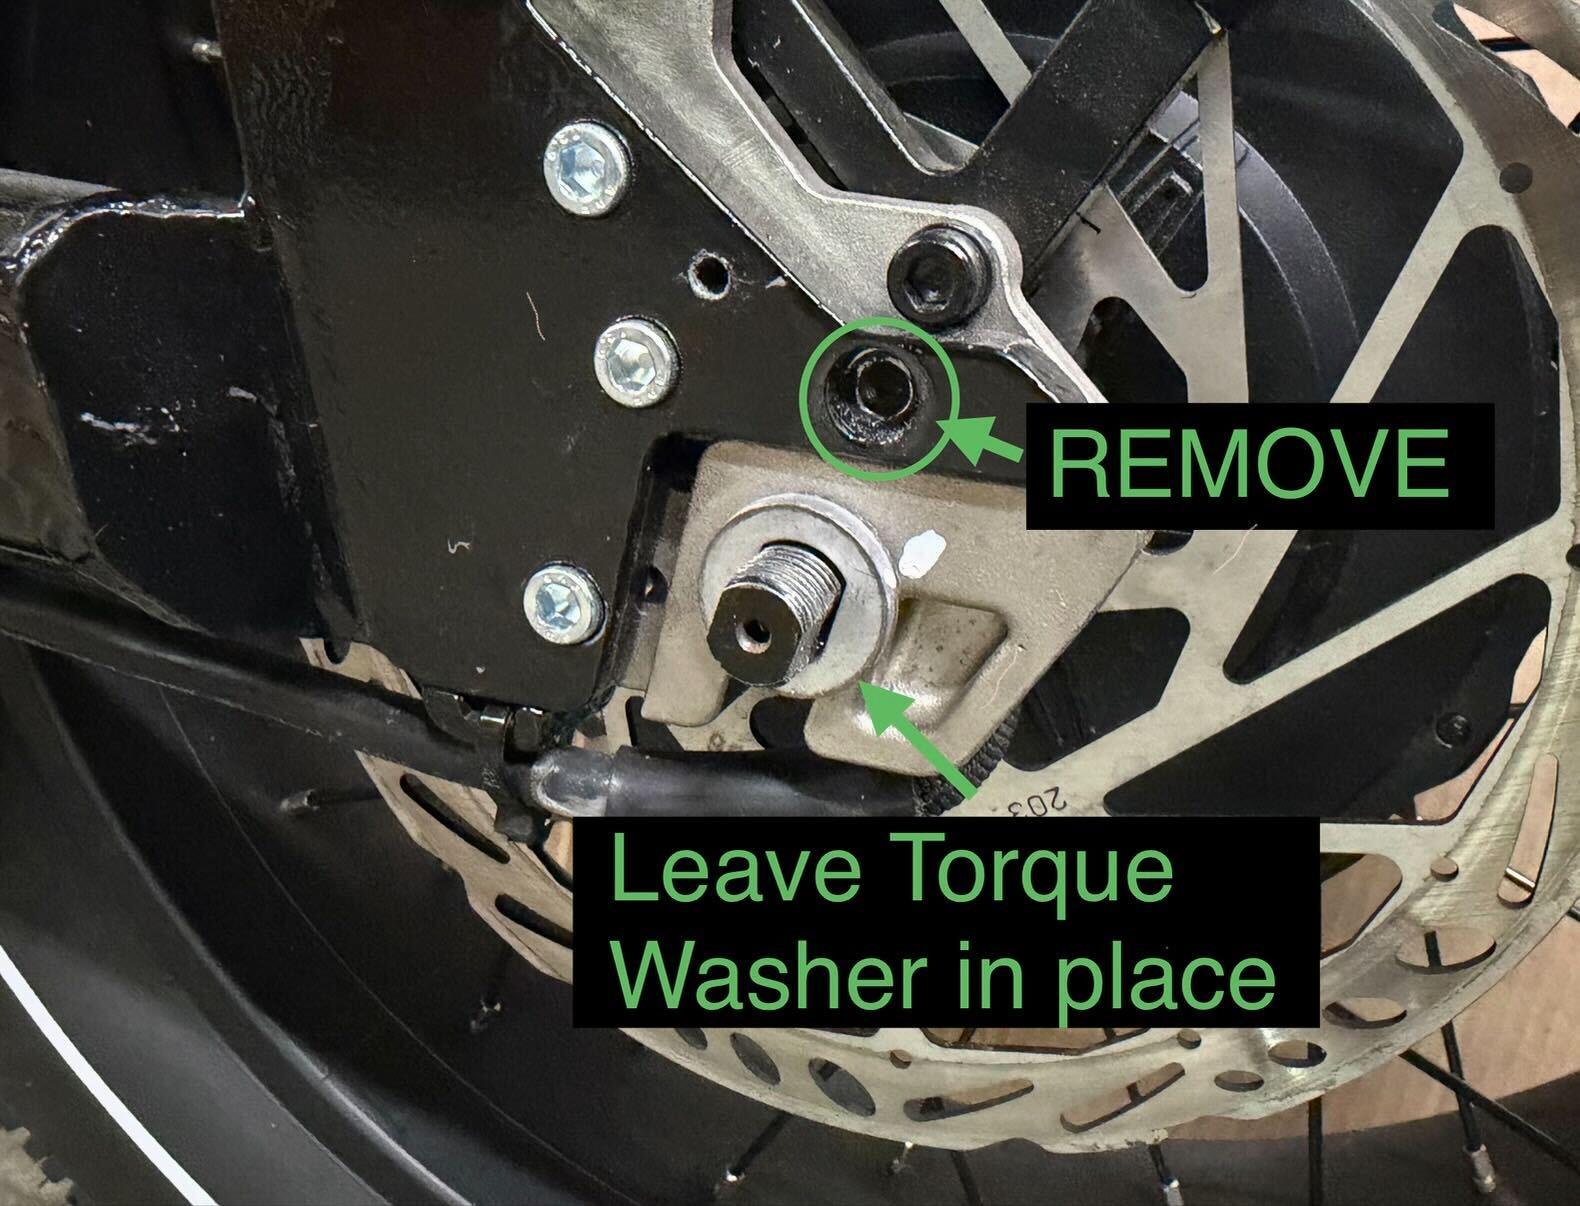
Remove the axle nut on the left-hand side of the bike (brake side) using a 21mm wrench. Leave the torque washer in place against the dropout.
- Remove Upper Frame Screw:
Remove the silver M6 screw located above the axle (do not remove the black screw) using a 5mm hex key.
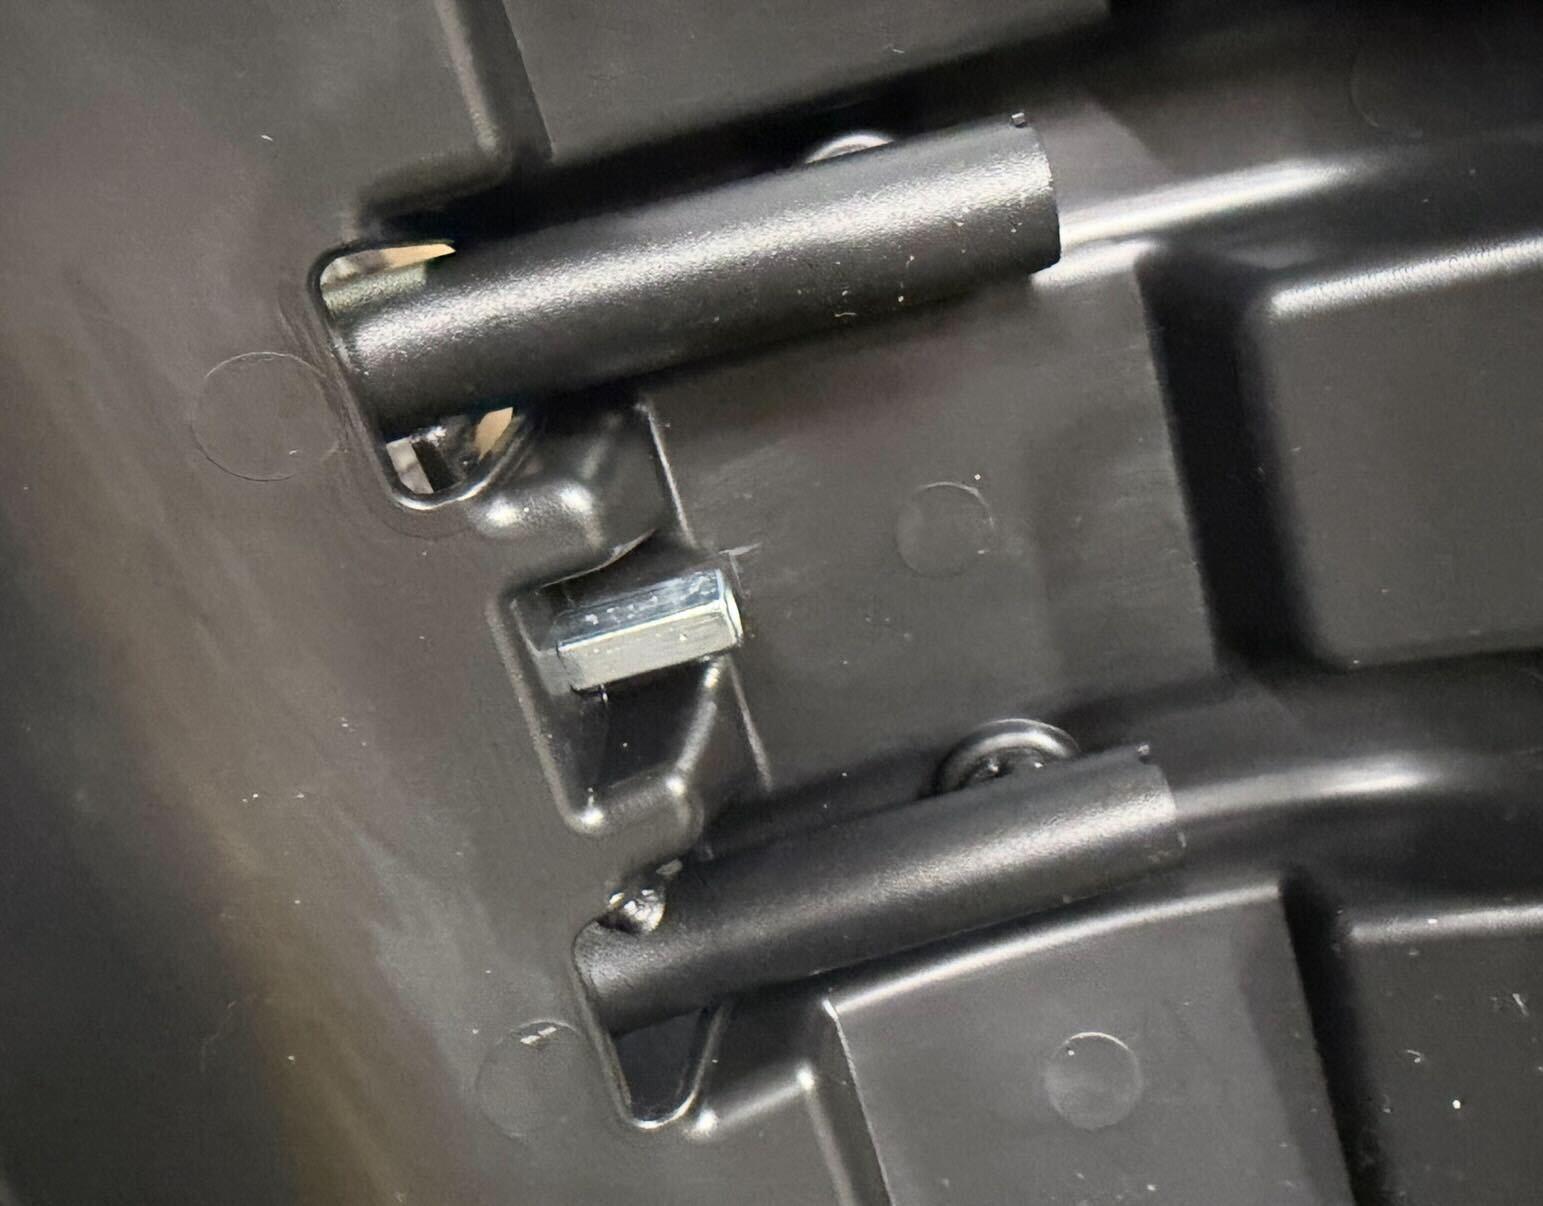
NOTE: An M6 nut on the backside of the dropout secures this screw to the frame. It will come loose when the screw is removed. Retain this nut, as it will be reused to secure the mounting bracket.
- Prepare Angle Adjustment Screw:
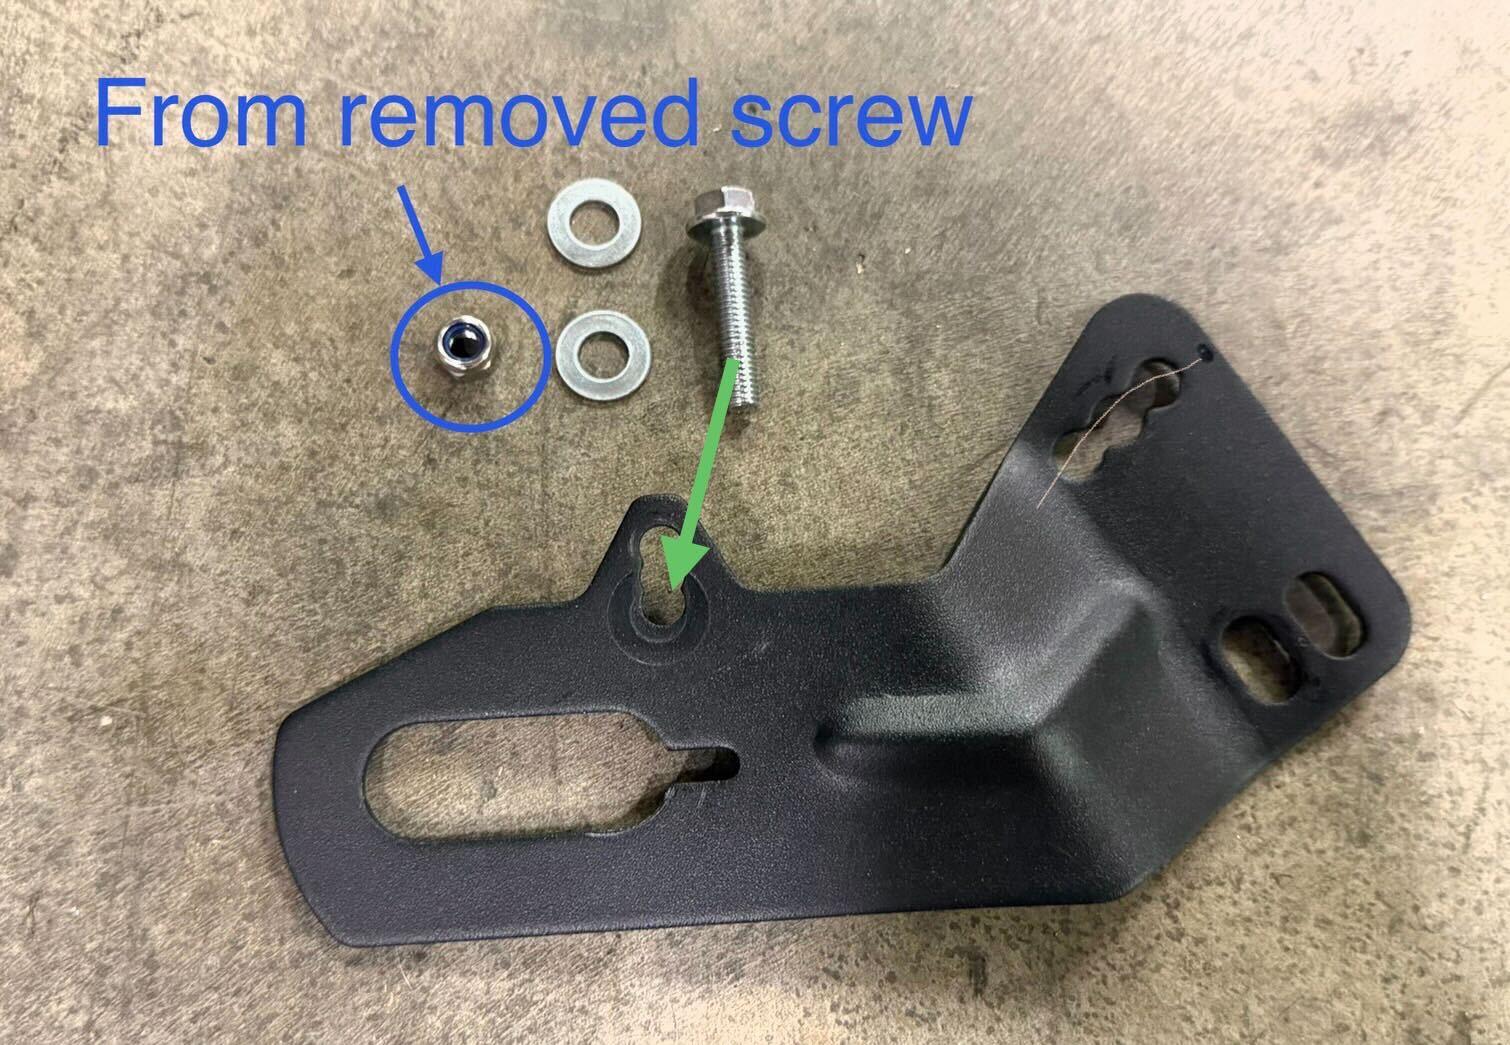
Locate the long M6 screw and the two large washers from the included hardware, along with the M6 nut retained from Step 3. Insert the long screw into the lowest position slot on the mounting bracket (indicated by the green arrow). This serves as the bracket angle adjustment screw.
- Set Washer Spacing:
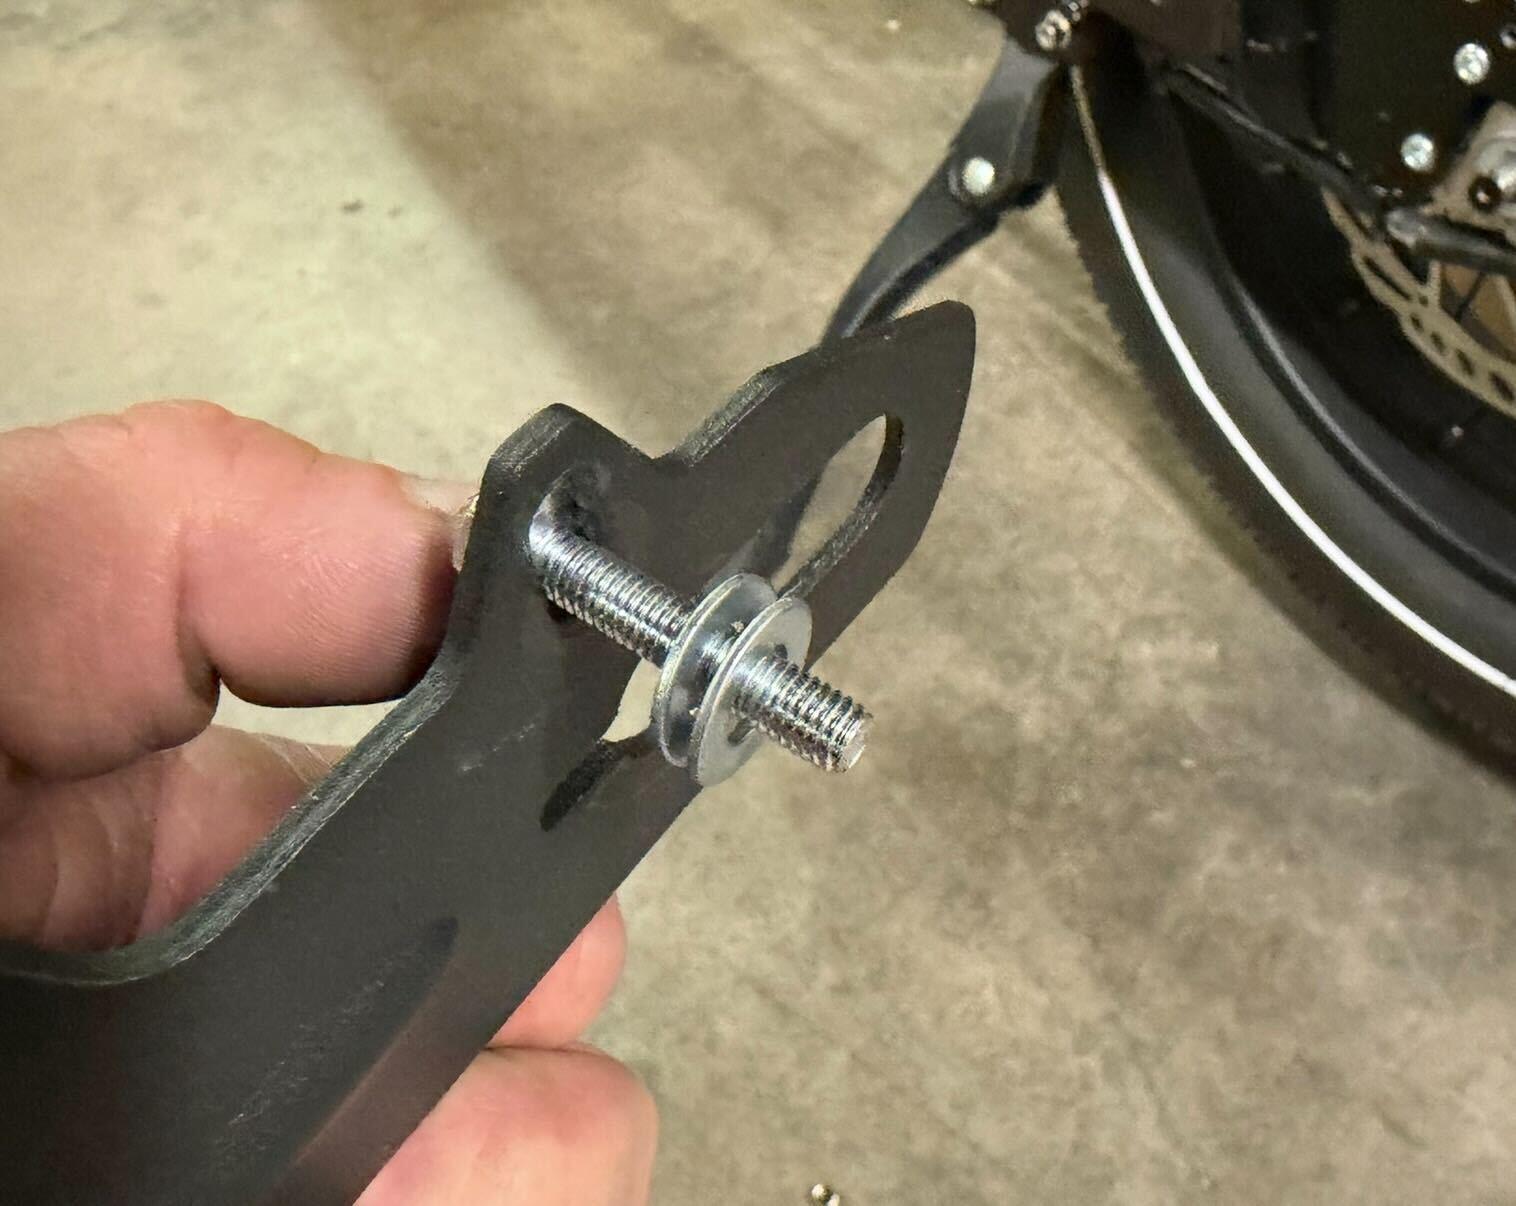
Place the two large washers onto the long M6 screw so they rest between the mounting bracket and the frame.
- Position Bracket & Align Rear Nut:
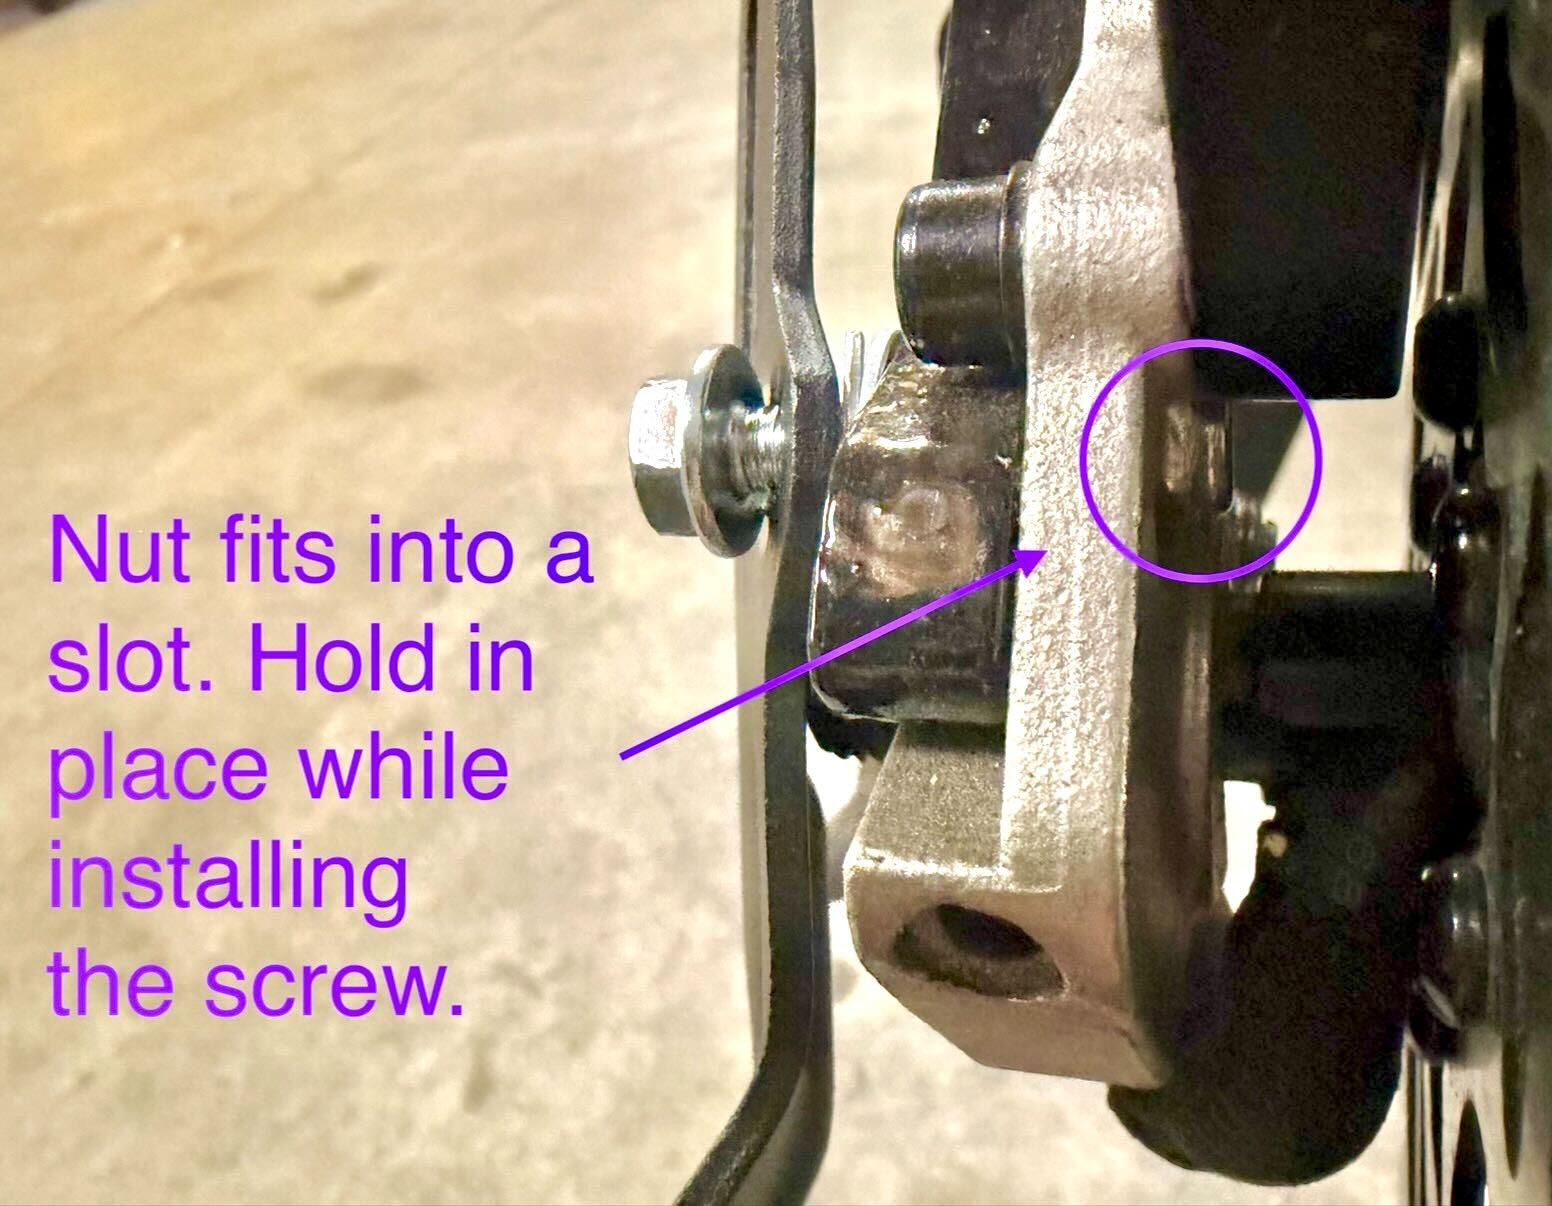
The M6 nut fits into a slot on the backside of the dropout behind the screw hole. Hold the nut in place with your finger while threading the long screw through. Leave the screw hand-tight for now.
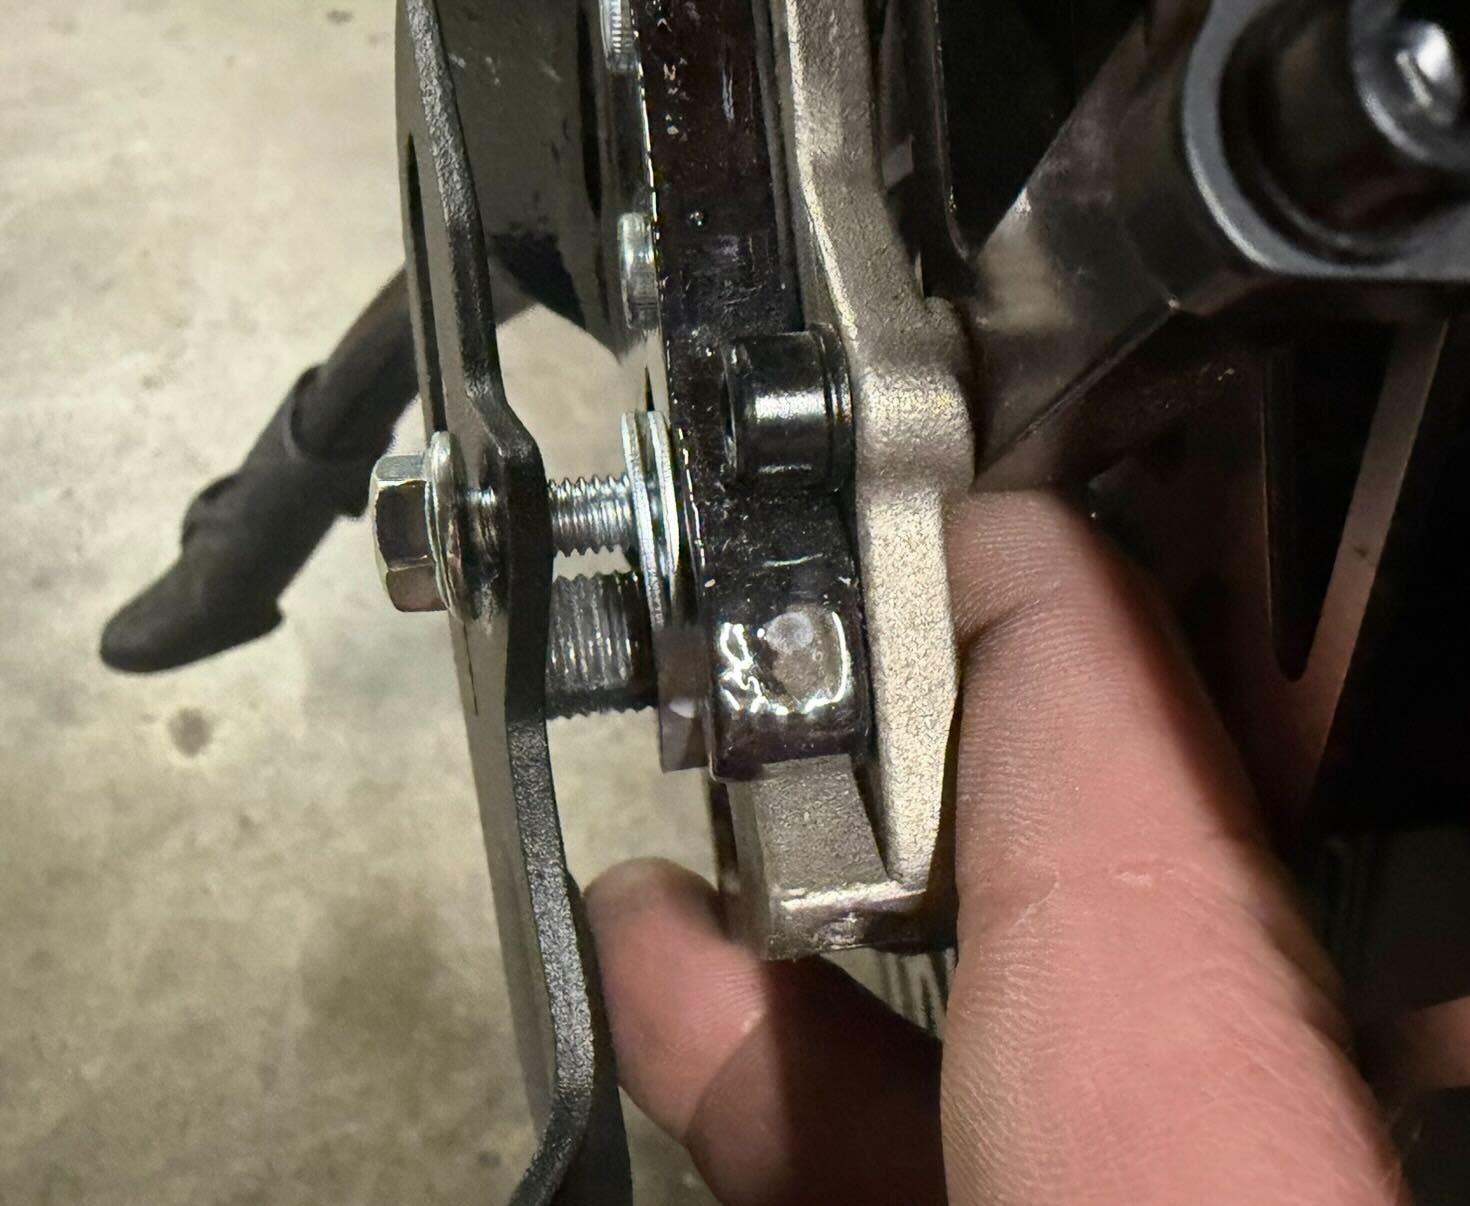
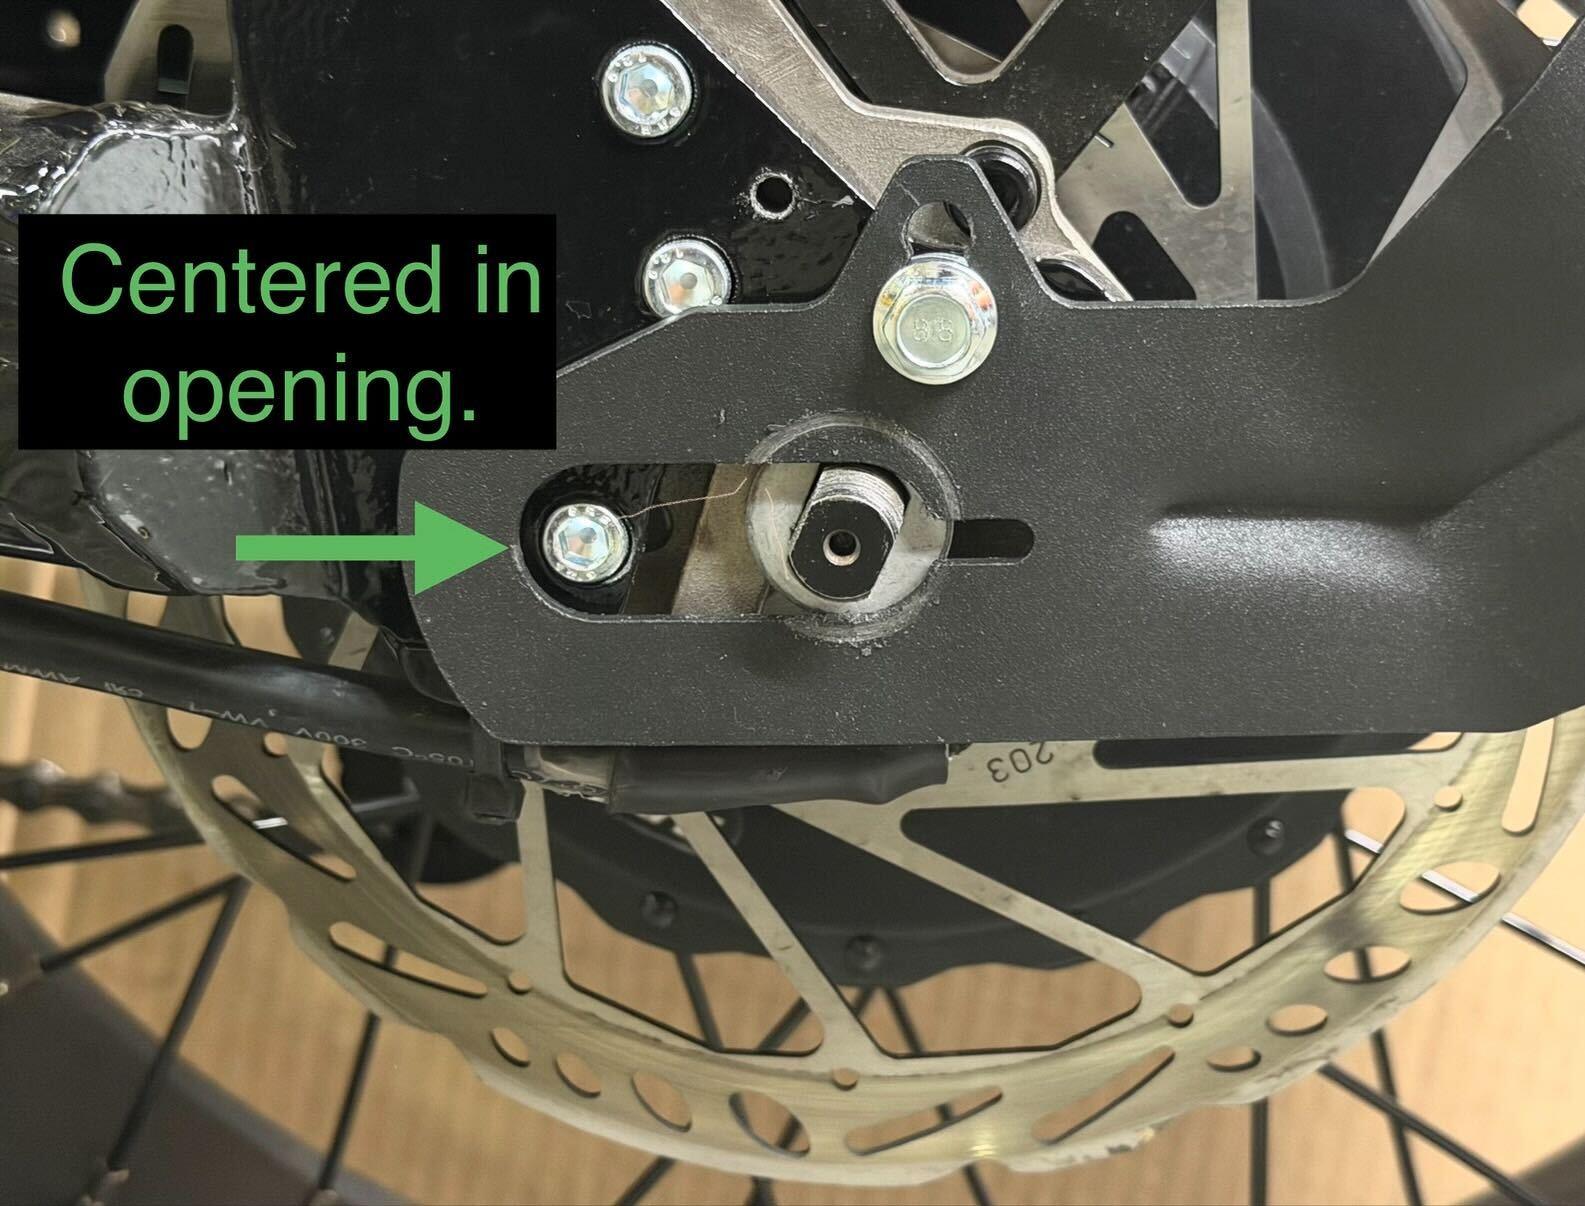
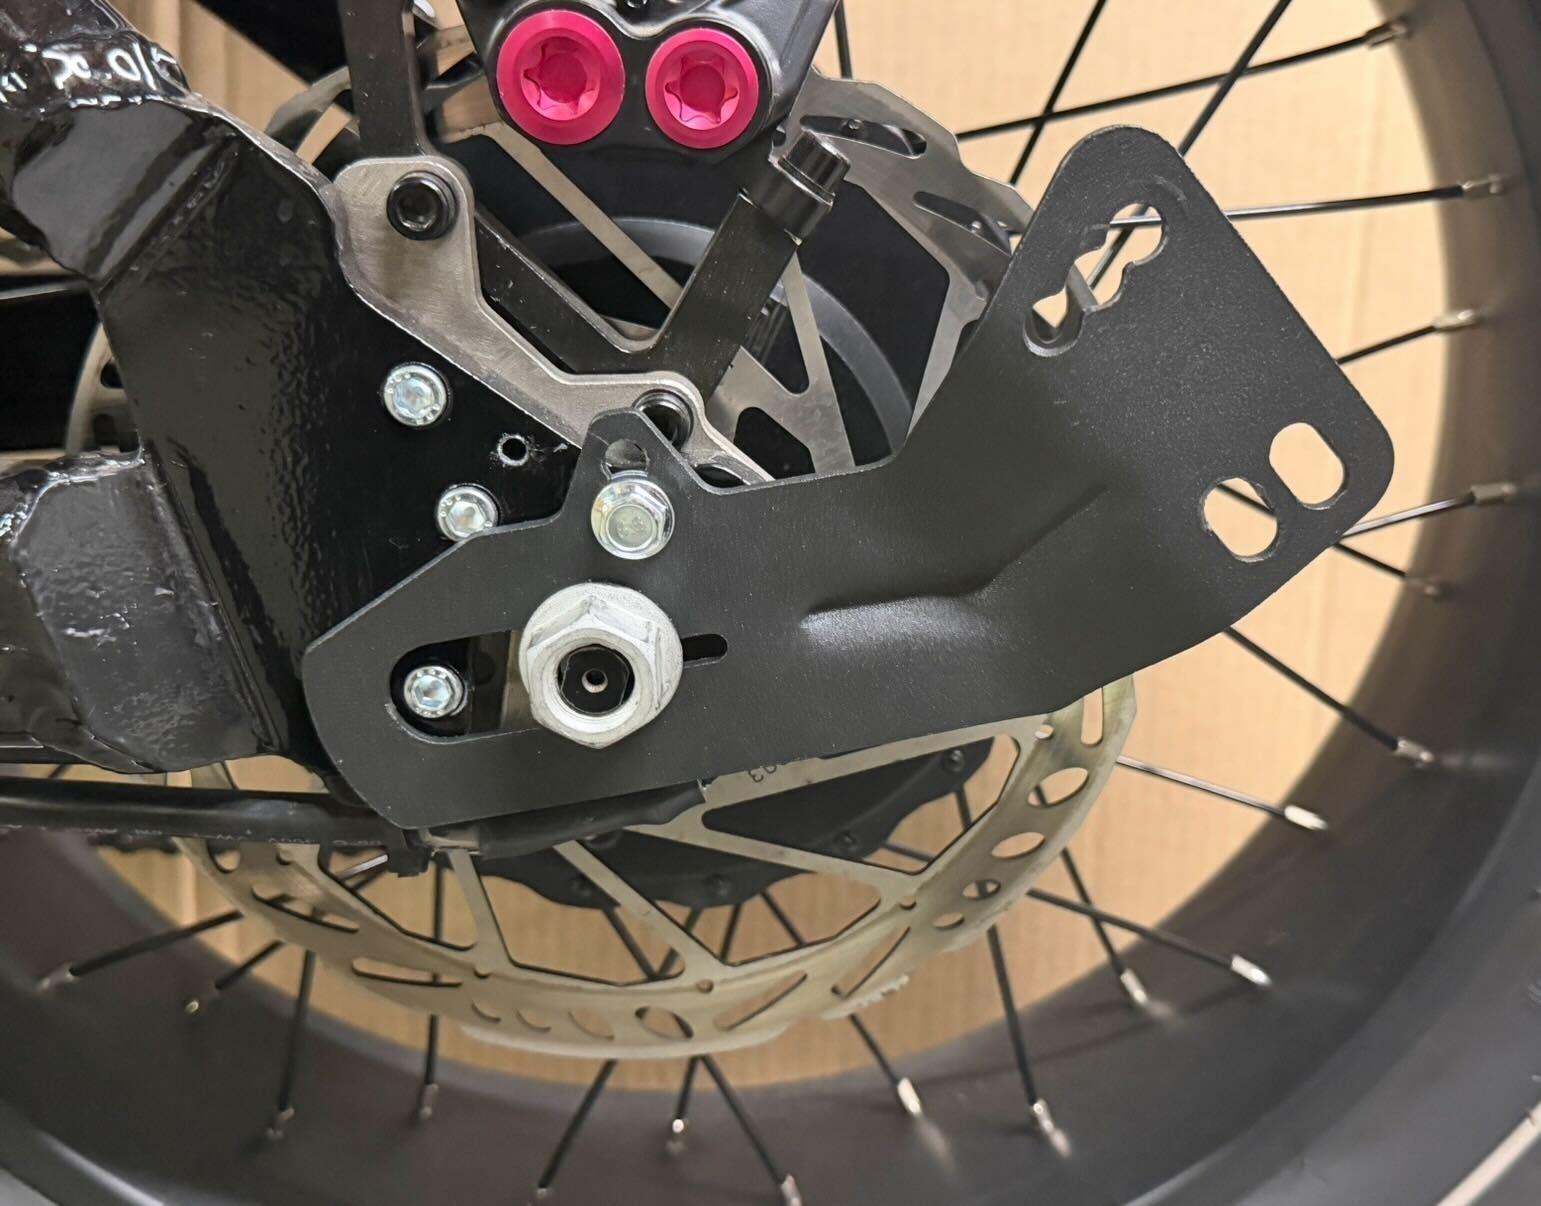
- Align & Torque Mounting Bracket:
Fit the bracket over the axle and thread the axle nut on finger-tight. Adjust the bracket angle so the screw head is centered within the bracket window. Hold the bracket firmly in position, tighten the M6 screw until snug, and torque the axle nut to standard operating specifications (refer to your owner's manual).
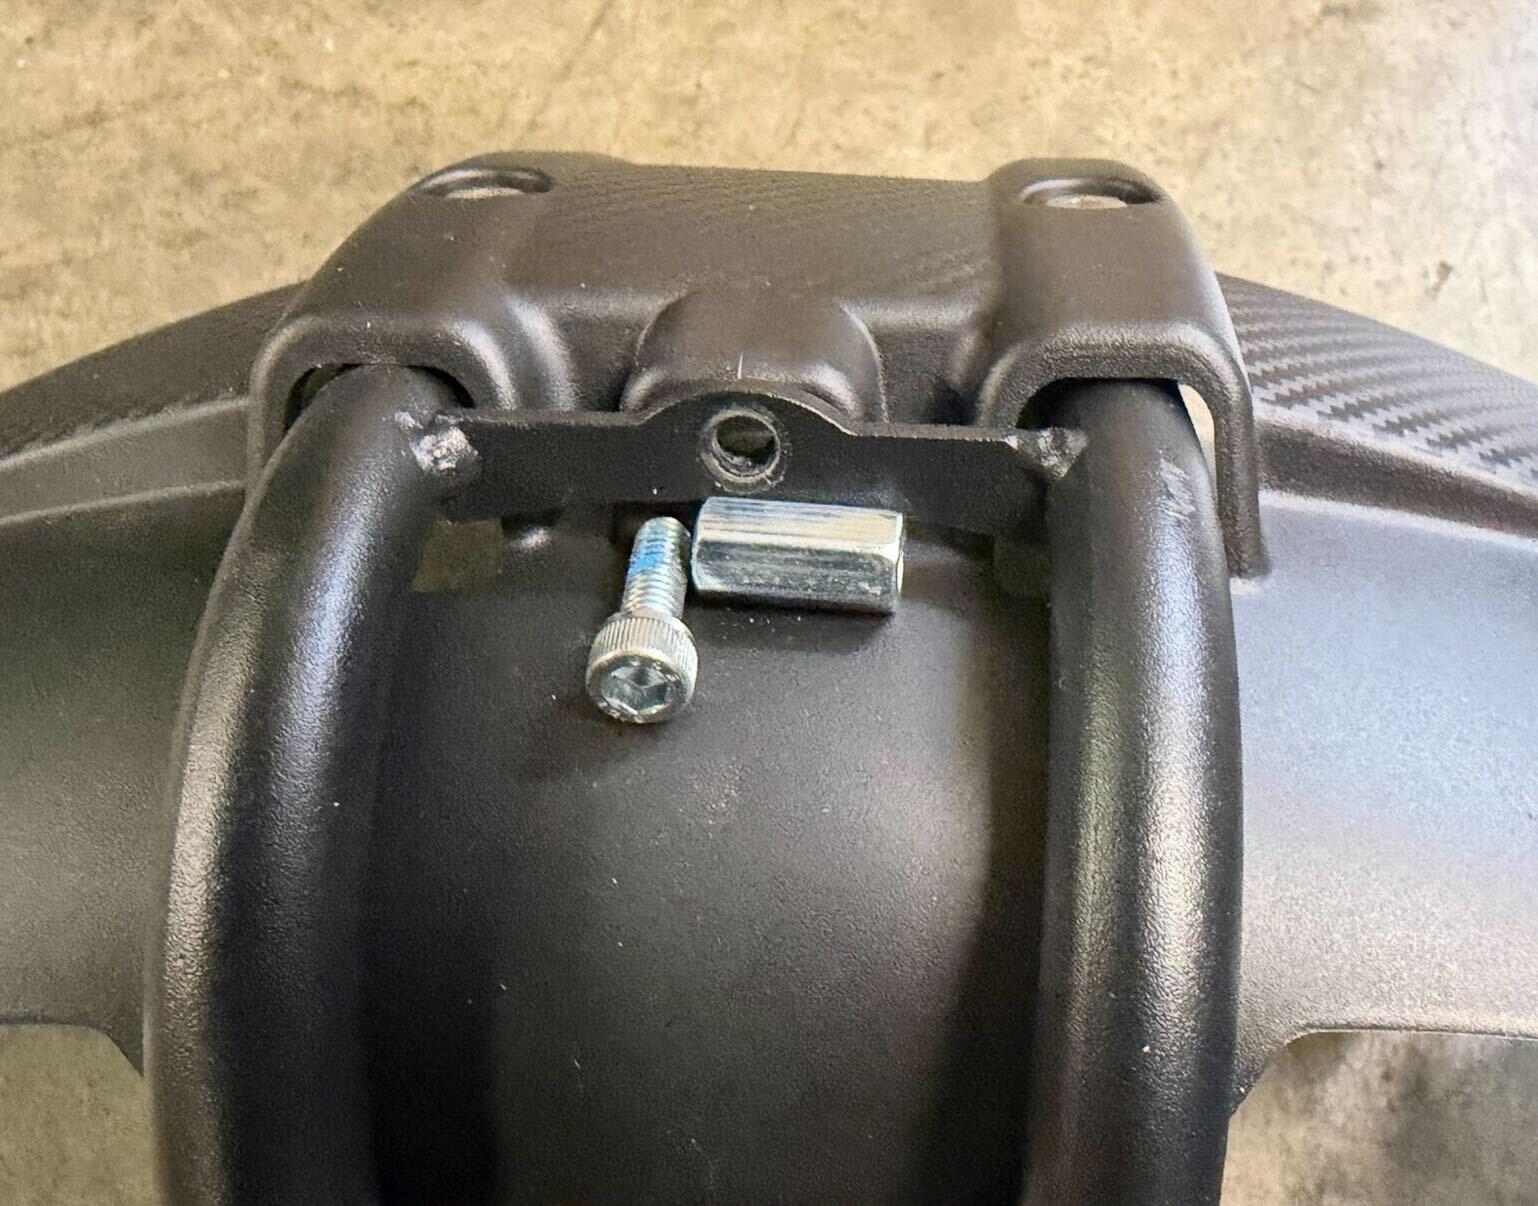
- Store Extra Hardware (Optional):
Locate the long M6 nut from the hardware kit and the original screw removed in Step 3. You may optionally install this screw and nut onto the fender arm bridge to keep them handy if the splash extender is ever removed.
- Mount Fender Extension to Bracket:
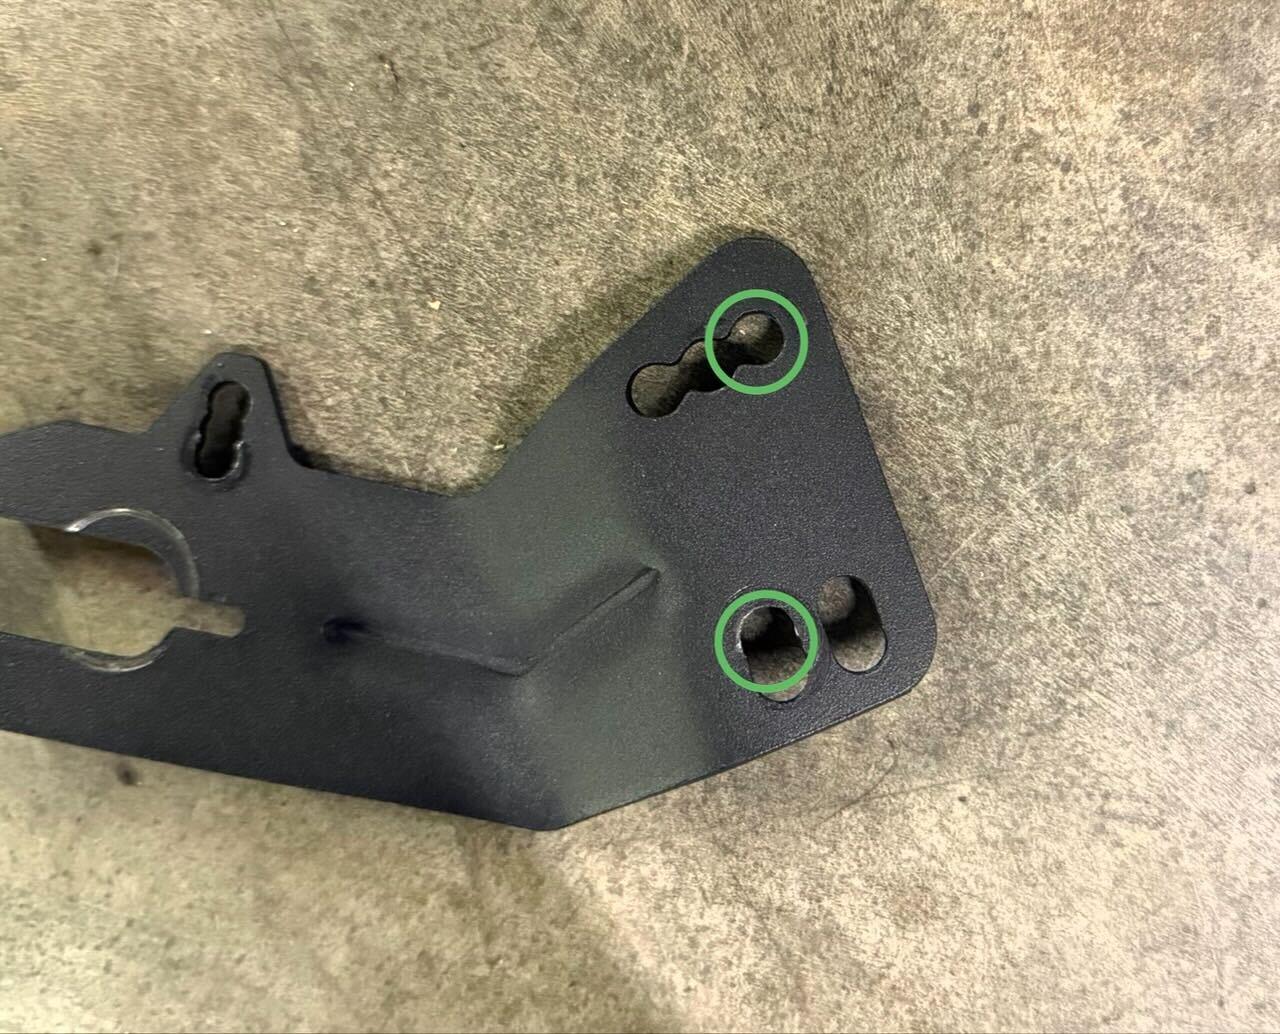
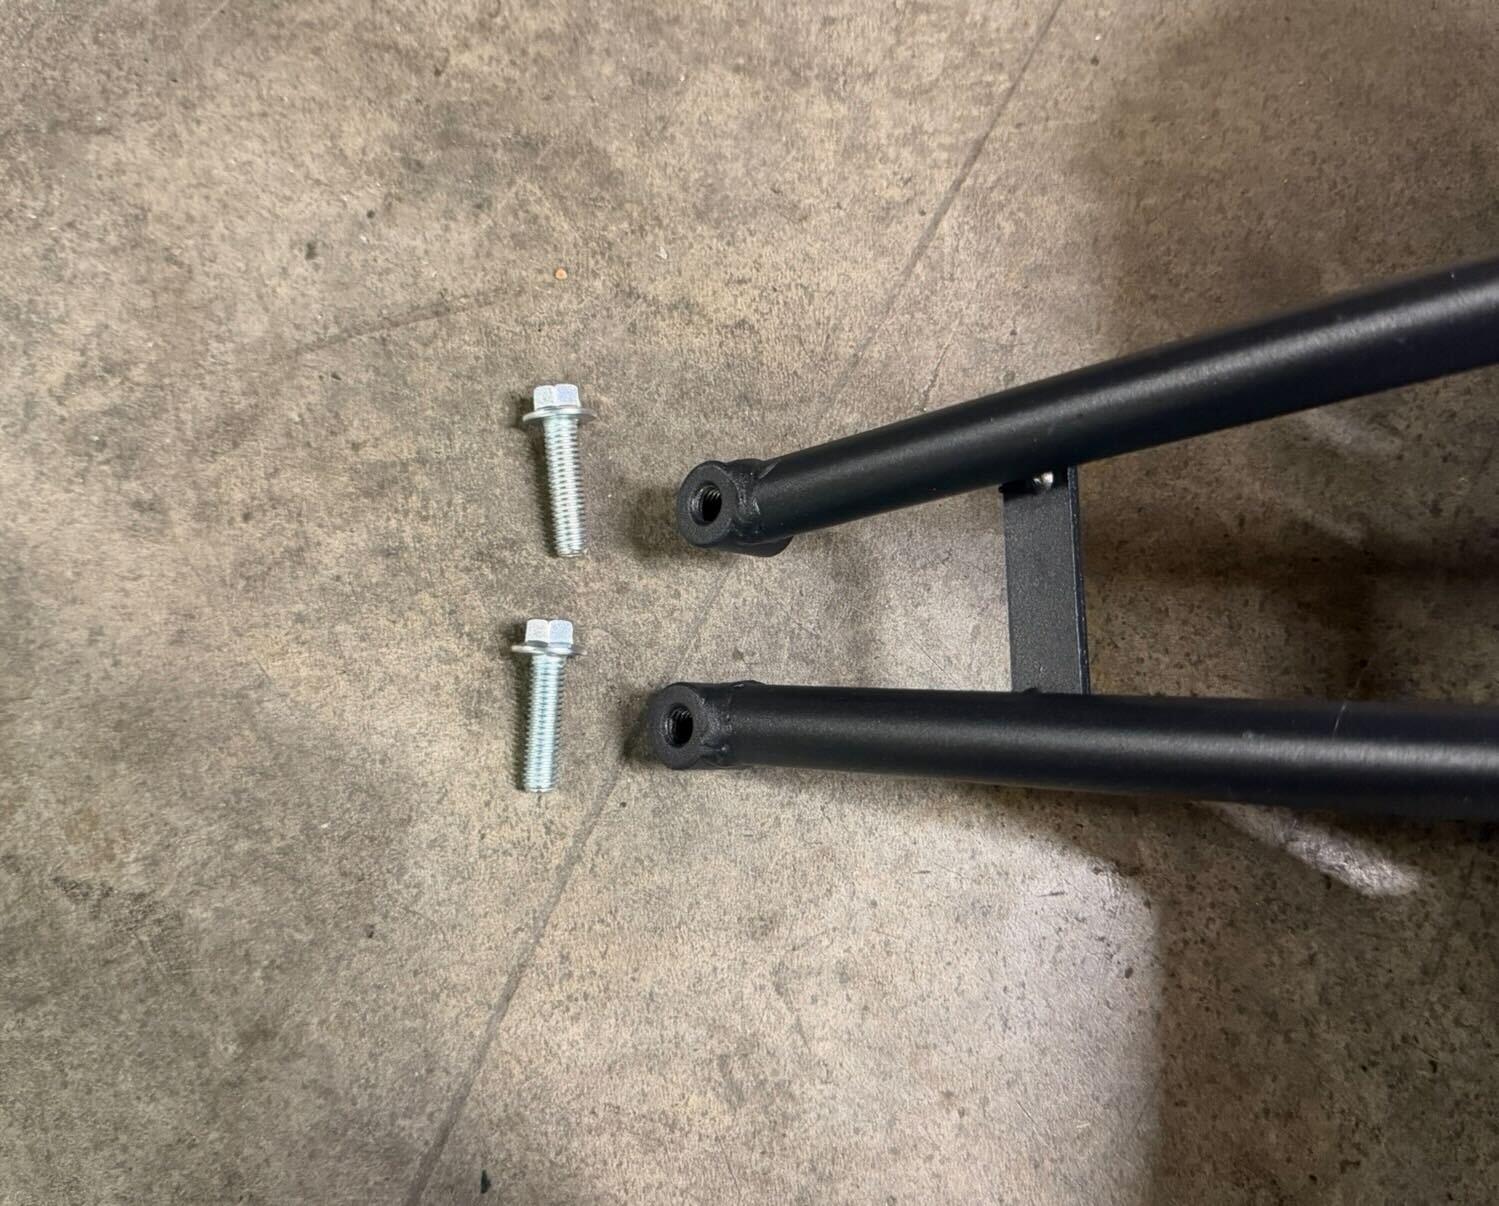
Secure the fender arm assembly to the mounting bracket using the long M8 screws and a 10mm wrench. Refer to the image callouts for correct slot selection.
- Final Inspection & Alignment Check:
Verify that all fasteners are fully tightened, paying extra attention to the axle nut. Spin the rear wheel to check that the tire does not rub against the splash extender. Minor alignment adjustments can be made by gently flexing the mounting arm, while larger positional adjustments require loosening the axle nut and angle screw to reposition the bracket.
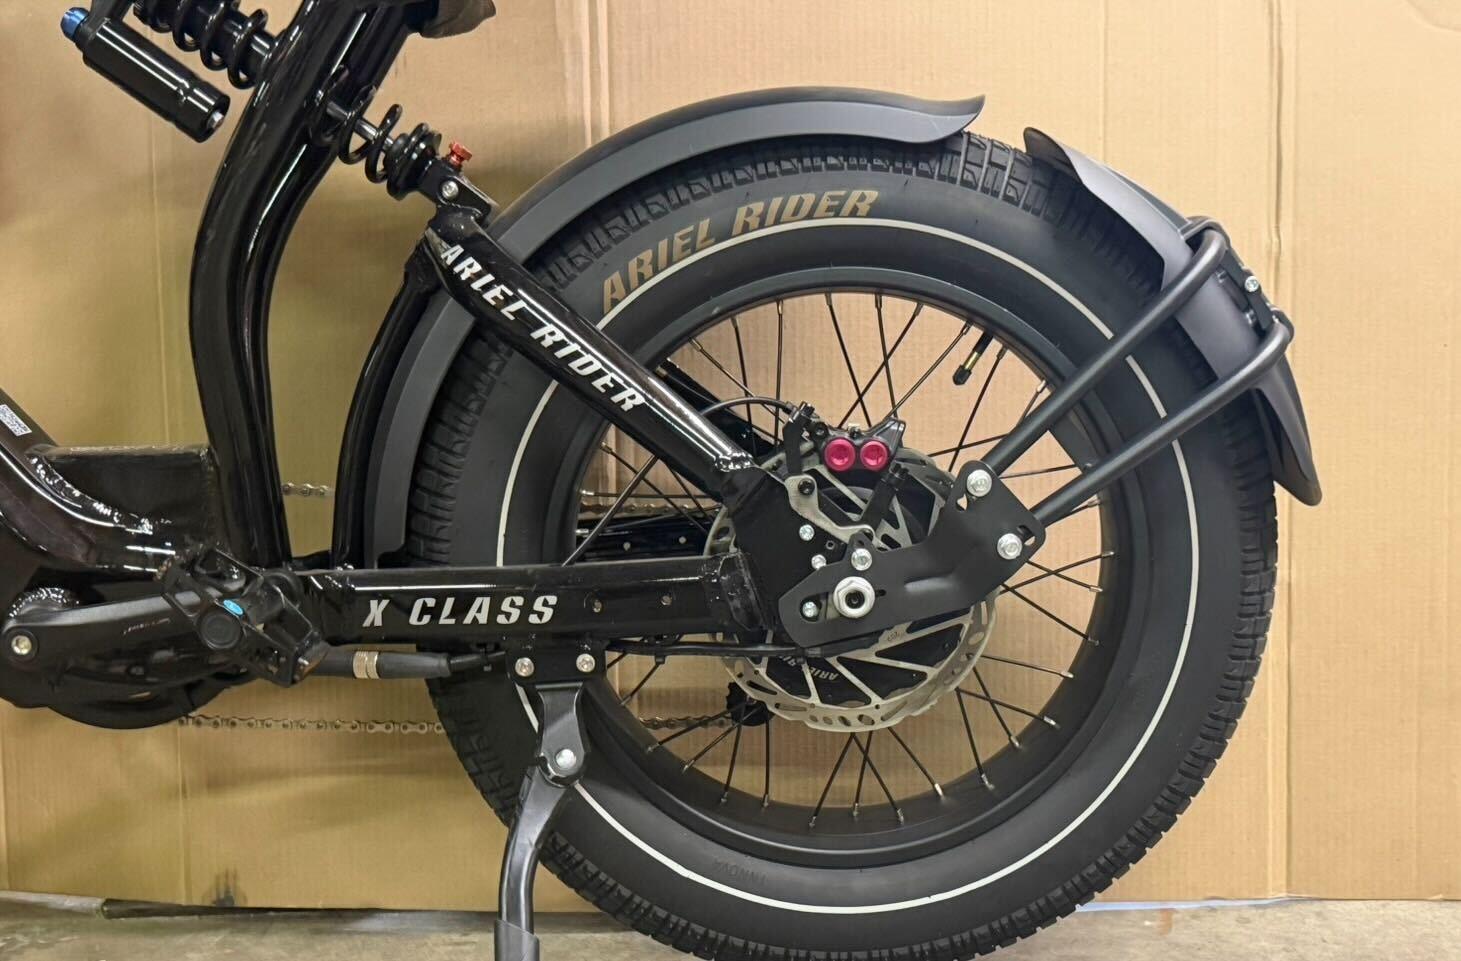
NOTE: Some extra hardware included in the kit will not be used for this model installation, as it is designated for future frame compatibility.
Need Further Assistance?
If you have questions regarding component alignment or torque specifications, please contact our support team through our Contact Form.